Adding Items to Your Catalog
We've gone above and beyond to set up your new store. You've added a Merchant, a Point of Sale, Employees, and Workplace, and even launched your POS device for the first time. However, before you can start selling your goods, you must create a catalog of items. This step is not just important; it's the backbone of a business's success. Creating a catalog with the Fortis POS Platform ensures that your items are conveniently displayed for employees and facilitate a business's fast and seamless operation. Let’s review the basic functionality and learn how to create a catalog!
Sign in to your Fortis POS Platform at https://my.fortis.world/auth/login
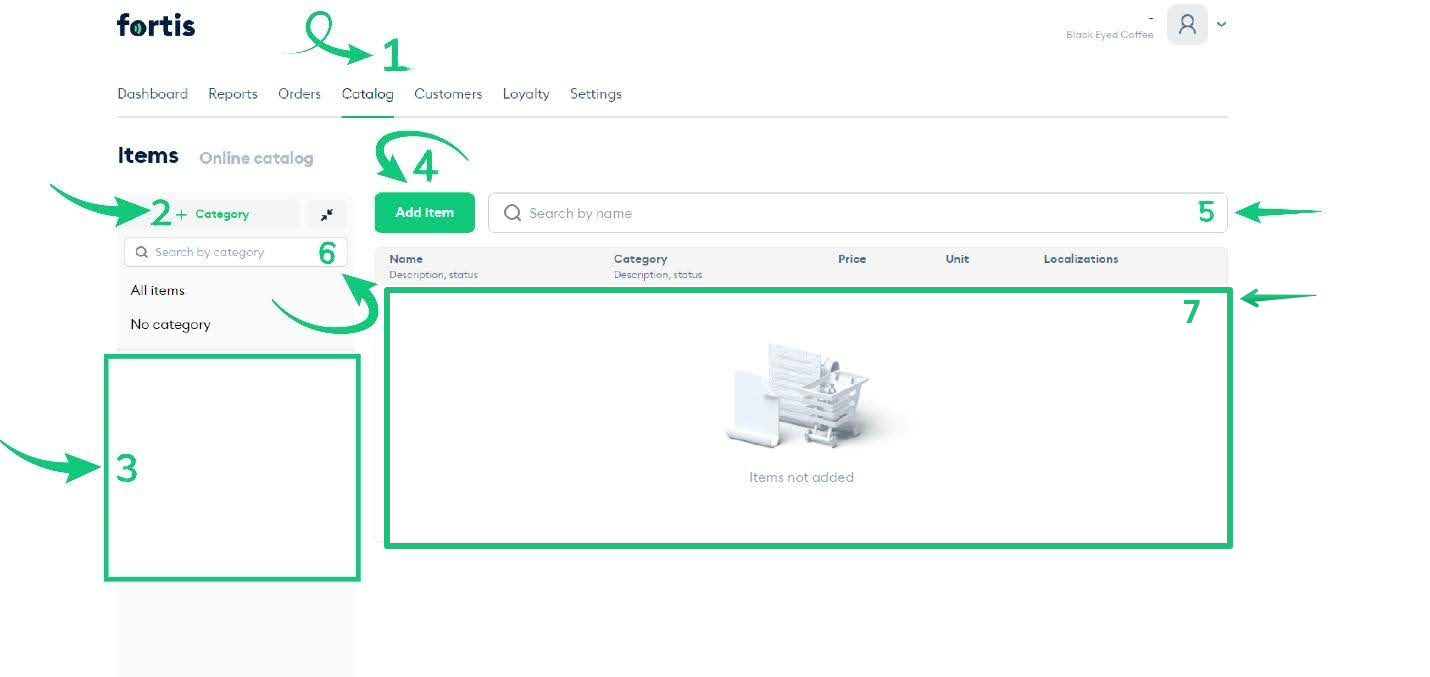
Click on Catalog (1) at the top menu. Here, you can see the Catalog's main page. Category (2) button creates a Parent category where you can add items (4) and their variations (more on that later). Once created, the area marked with (3) will display Parent categories. The main page conveniently offers functionality to search items by parent category (6) or name independent of category (5). Items found will be dispplayed in the area (7)
To create your Catalog, click Category (2) to add a Parent category. That is the first step in organizing your items. Here, you can select Status (1) as Active or Hidden.
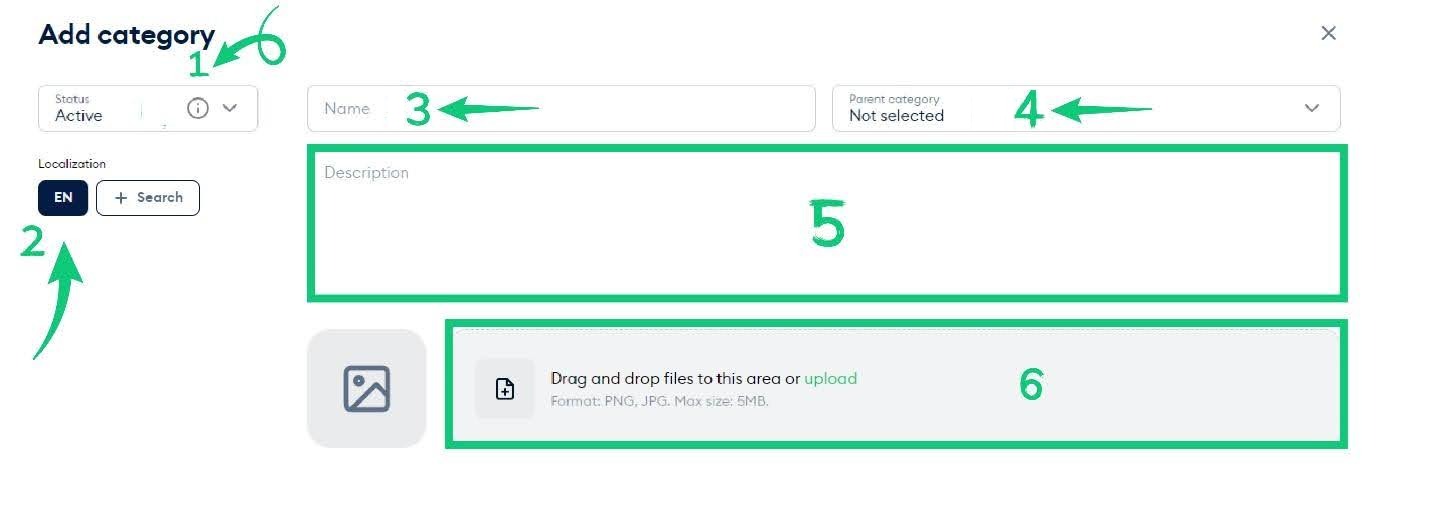
The Localization feature (2) is a powerful tool for adapting your catalog to different languages and regions. However, at the moment, it only supports the English language. Rest assured, our developers are continuously working to add support for other languages, further enhancing our product's usability for our global merchants. This commitment to improvement is a testament to our dedication to providing our merchants with the best catalog management tool.
The Parent section (4) will be empty before you create your first category, but once you create your first Parent category using the Name field (3), you can nest other items inside.
Description (5) provides a convenient way to describe your Parent category, and section (6) allows you to upload up to 5MB photos in PNG or JPG format. Feel free to enter the name of your first Parent category and hit Save.
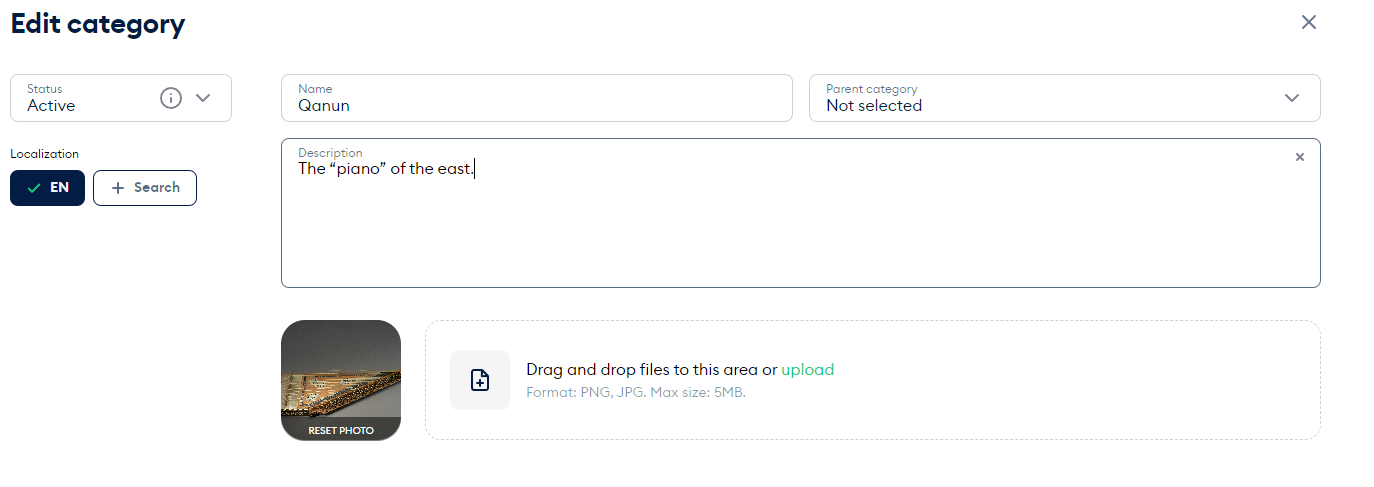
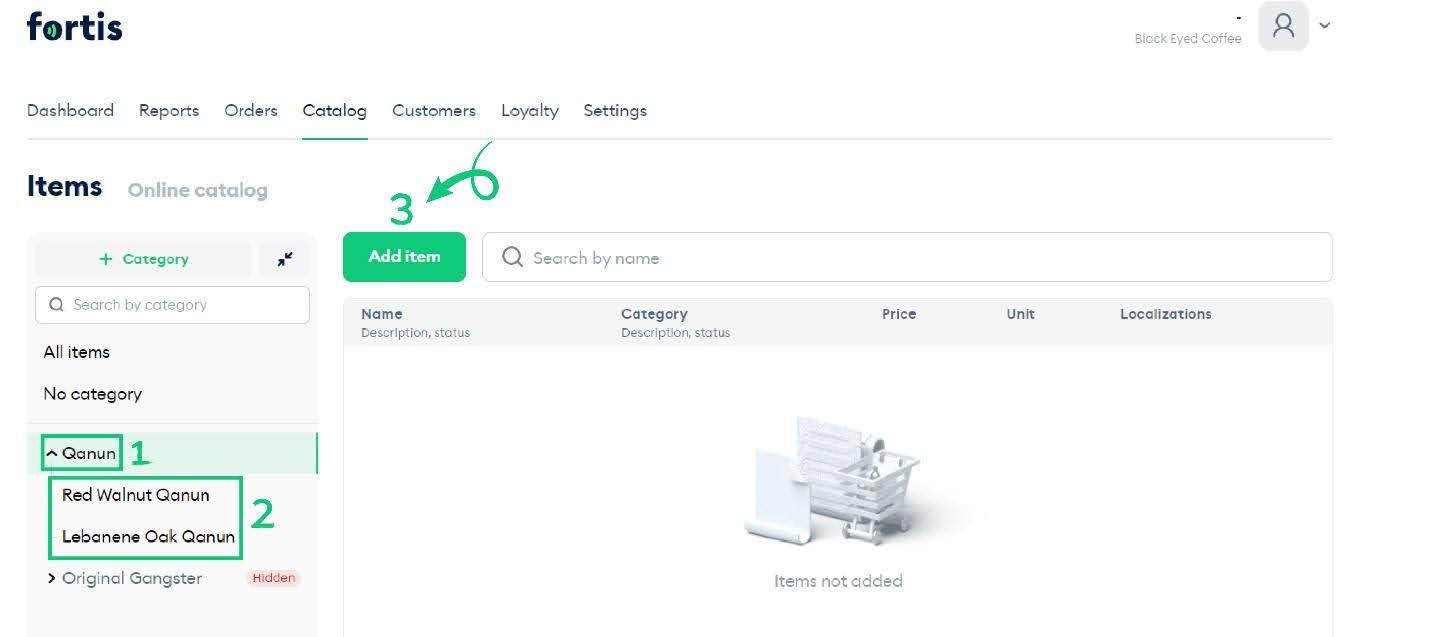
Now, let’s see how to add a Subcategory to the Qanun category we created in the previous screenshot. To do so, click on the newly created category, and then on the Category button.
At that time, choosing the Parent category and adding the Name will create a subsection under the Parent category. Let’s call our subsection, Lebanese Oak Qanun, and hit the Add button. The resulting subsection will look as follows: the Parent Qanun category has two distinct Red Walnut Qanun and Lebanese Oak Qanun (2) subcategories. You can select any of those three categories and click on the Add item button to add items to any one of those, creating further variation
A New item window will appear. Here, at the top left, you can find familiar Status and Localization options. The other options are Main name (1), Description (2), Category, Unit, and Type (3).
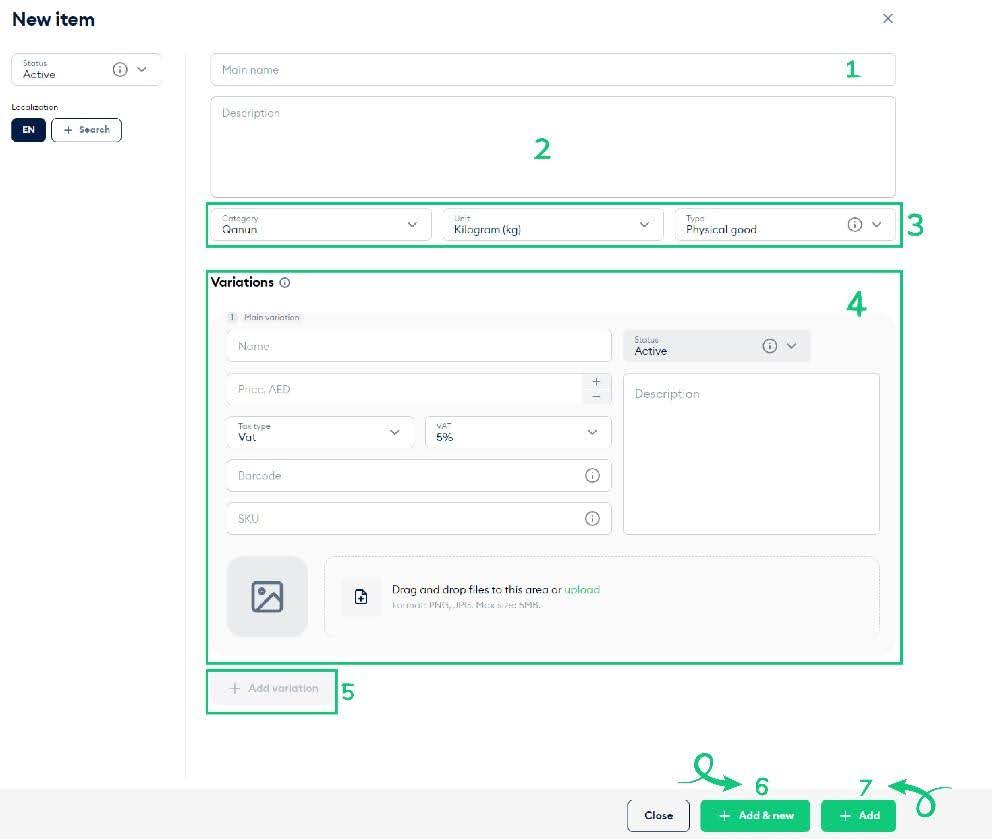
Category lets you select the Parent category. The Unit allows you to choose between the following options:
Kilogram(kg) Gram(gm) Milligram(mg) Piece(pc) Litre(I) Milliliters(ml) Minute(min) Hour(hr) Day(d) Week(wk) Month(mo) Year(yr) Meter(m) Centimeter(cm) Other
But we are selling musical instruments in kilograms here. Hehe!
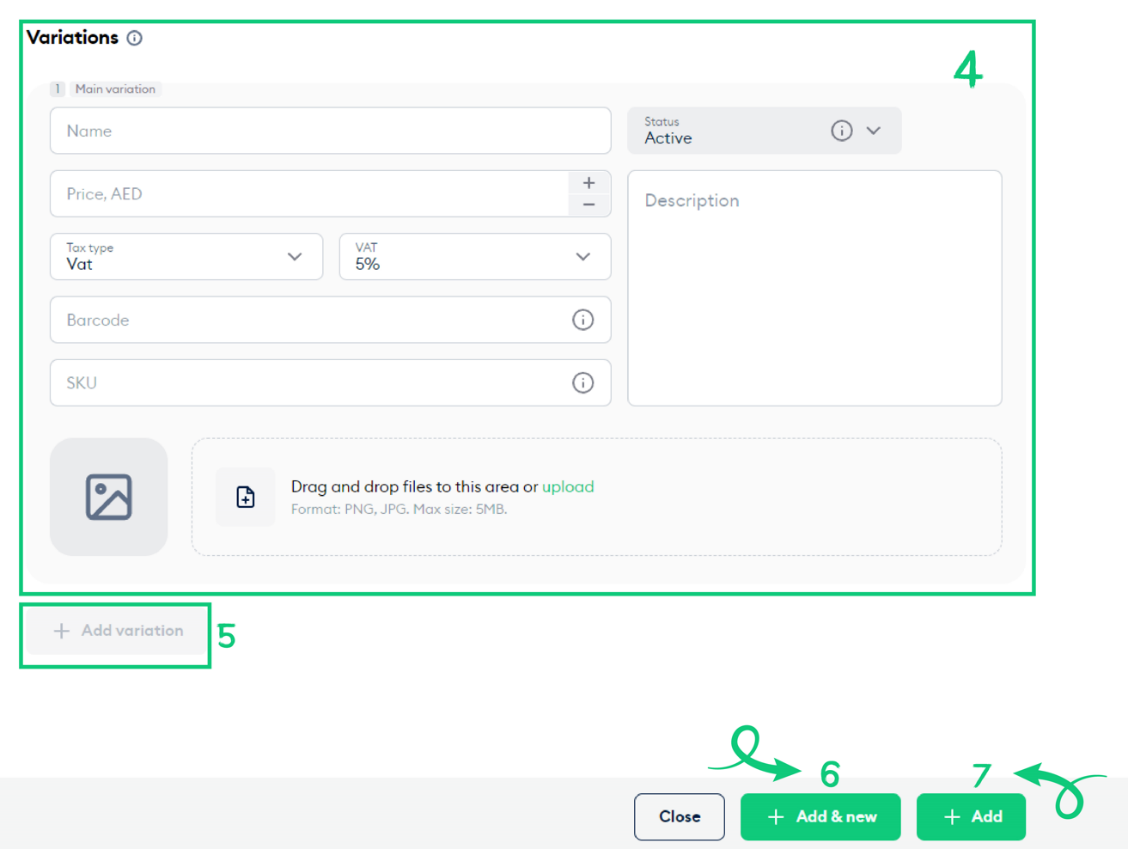
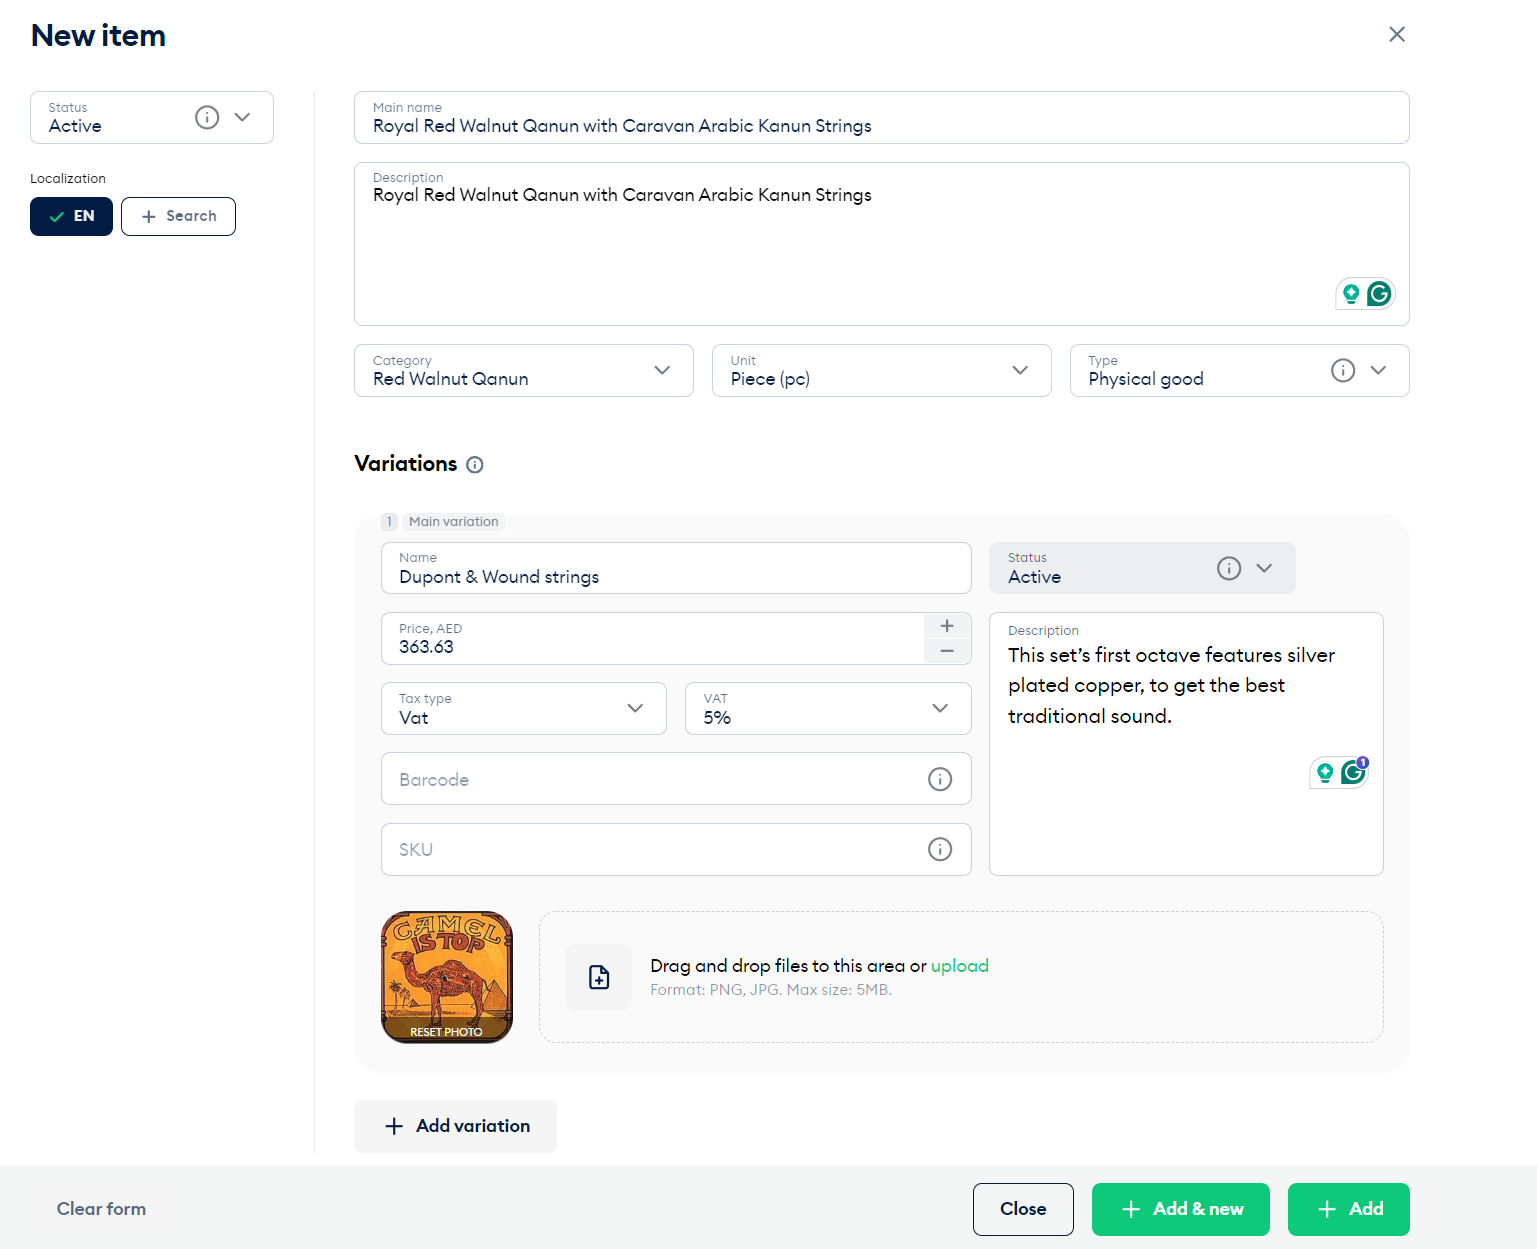
You can add several variations to your main item. Add Name, Price in AED, set Tax type, VAT in percentages (%), optional Barcode, SKU, and description. Of course, you can also add a photo for your variant.
Hit Add to add the item and exit the window.
Attention! Entering a fake Barcode will result in an error. In such a case, the New item window will change to the Edit item window and wait for a new input into the Barcode entry. You can advise a merchant to leave the field empty or enter an actual Barcode
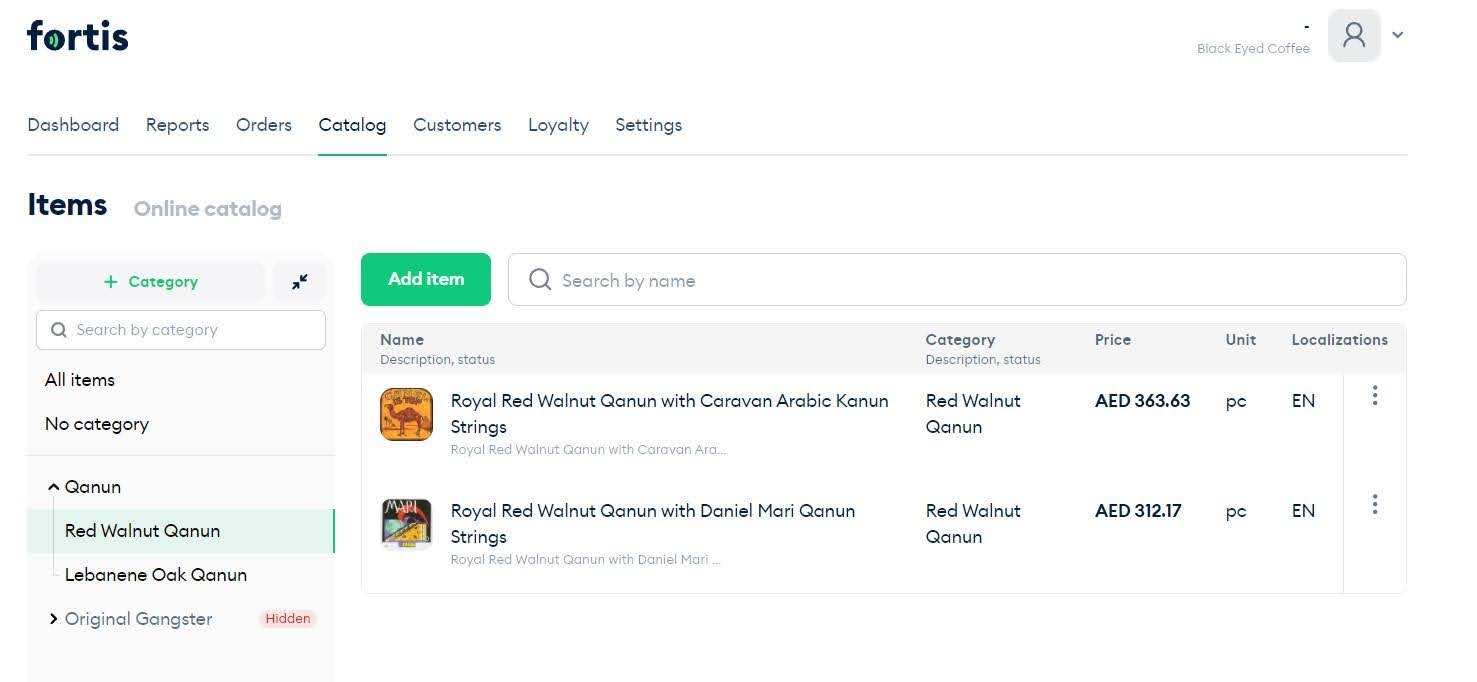
That's it! We created the Qanun parent section, with two subsections called Red Walnut Qanun and Lebanese Oak Qanun. Further, we differentiated that the Red Walnut Qanun comes with Caravan Arabic Qanun Strings. To add another Red Walnut Qanun but with Daniel Mari Kanun Strings, all we have to do is select the Red Walnut Qanun parent section, click on the Add item button, and repeat the procedure.
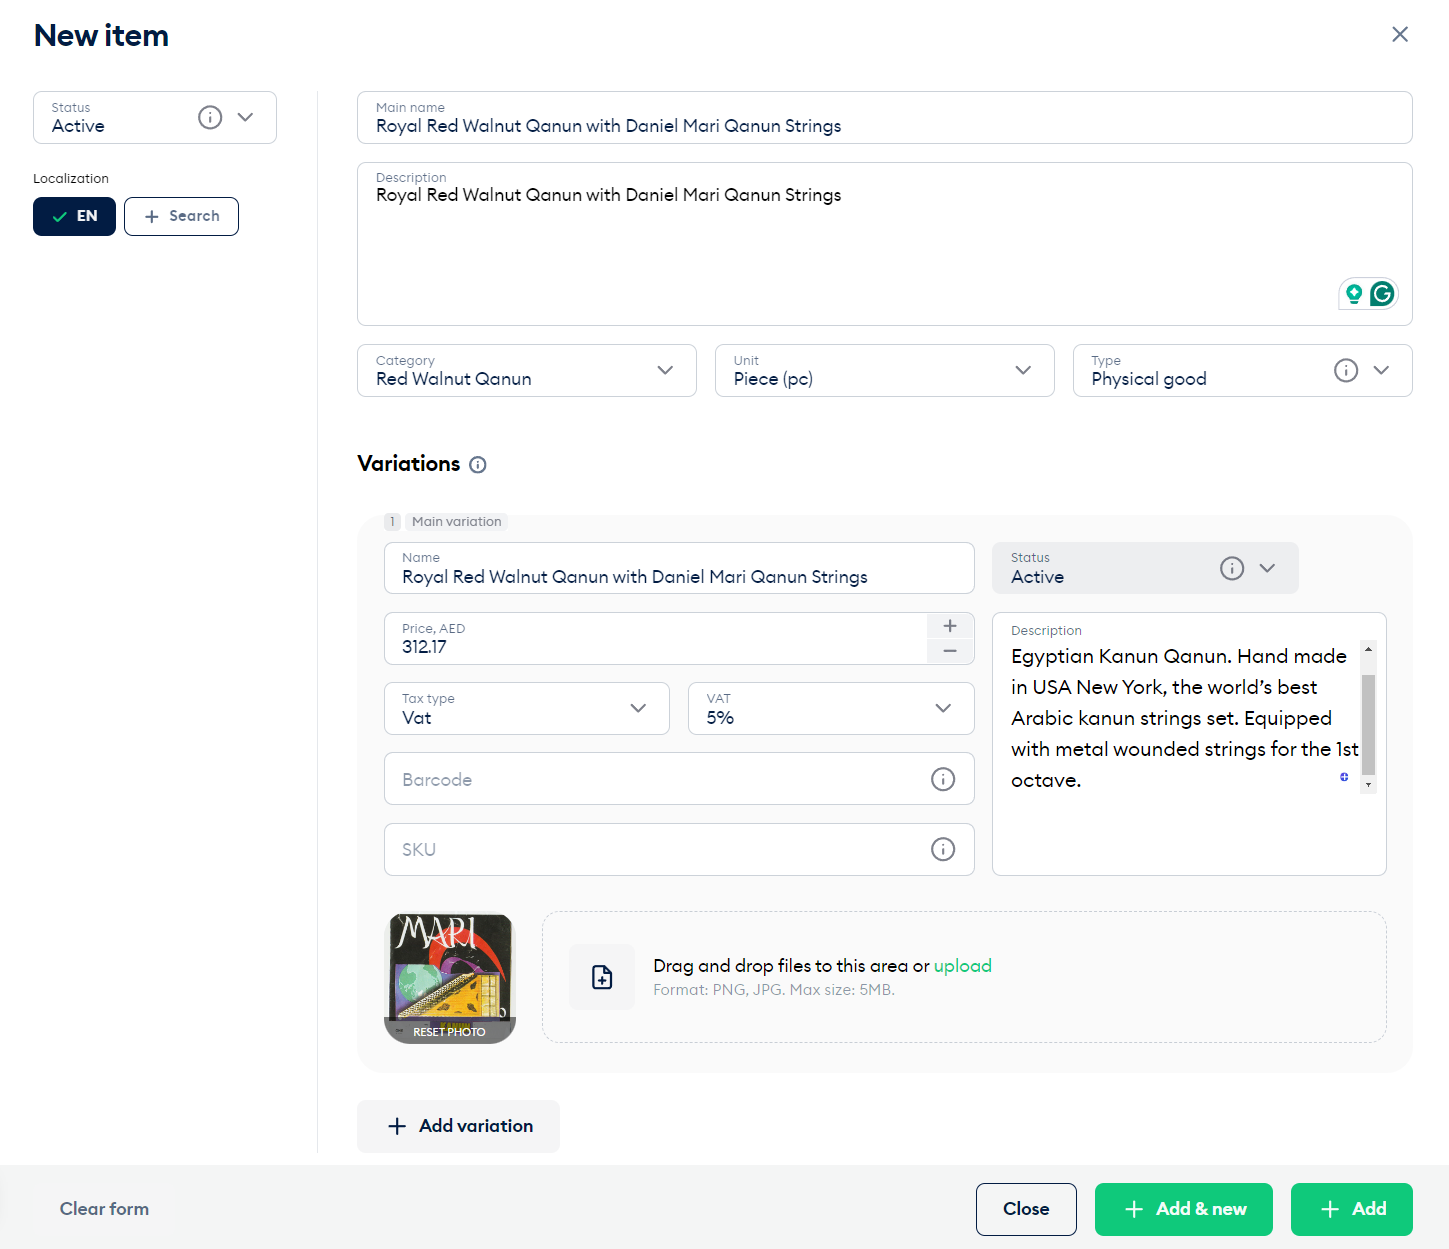
Remember to hit Add or Add & new. Add will add a subcategory and return it to the catalog, whereas Add & new will conveniently create a new form for a new subcategory.
Let's see what we've got. Brilliant!
However, we are still going. Next, we will learn how to add new customers and set up loyalty programs!