Adding a POS Terminal
POS Terminal is a device that you use for selling things. Once you add a POS Terminal and sign in to it using an Employee’s account, you can start selling your goods and services. Let’s see how to add a new POS Terminal to your Fortis database.
Add POS Terminal
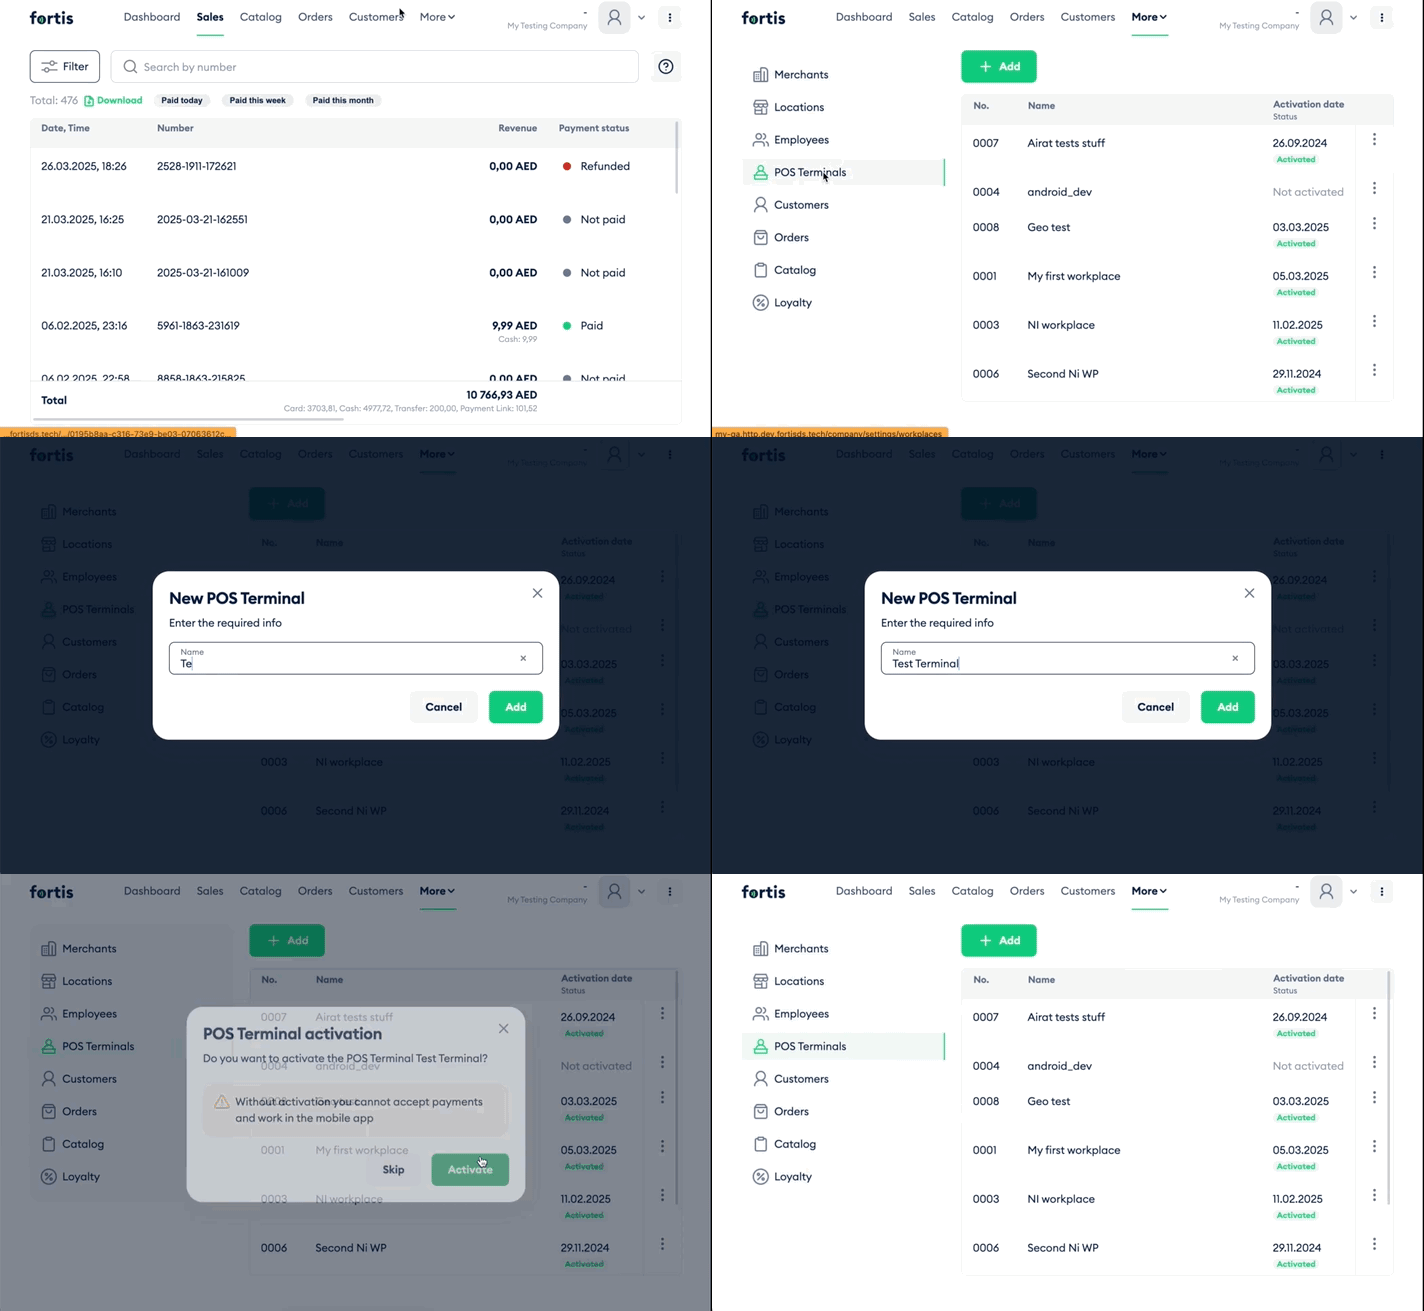
- Sign in to your Fortis POS Platform at https://my.fortis.world/auth/login
- Go to Settings → POS Terminals.
- Click Add.
- Fill in the form. Required fields are marked red.
- Click Actiate and copy the 8-digit Activation Code. You will need it, when your Employee will first log in to the POS Terminal. You can Skip this process and activate the terminal later.
Actiate or Deactivate POS Terminal
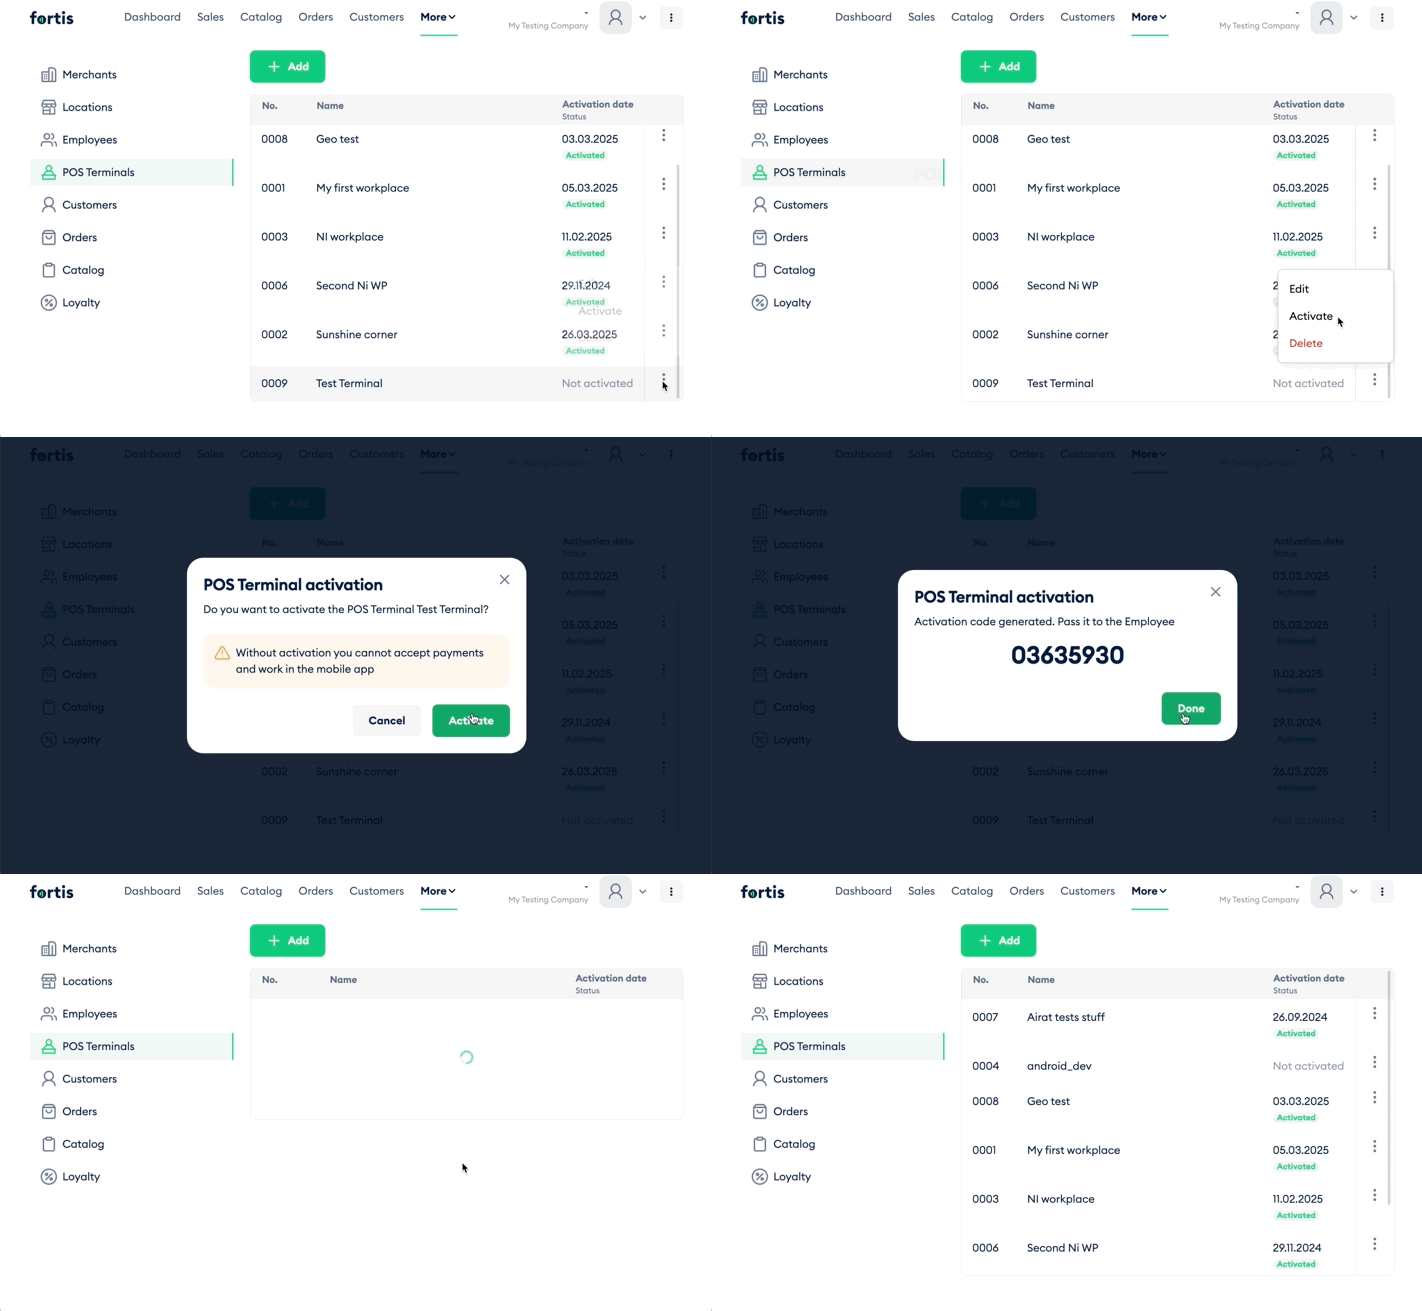
To Activate the POS Terminal:
- Go to Settings → POS Terminals.
- Find your Terminal in the list and open its menu.
- Click Activate.
- Copy the 8-digit Activation Code. You will need it, when your Employee will first log in to the POS Terminal.
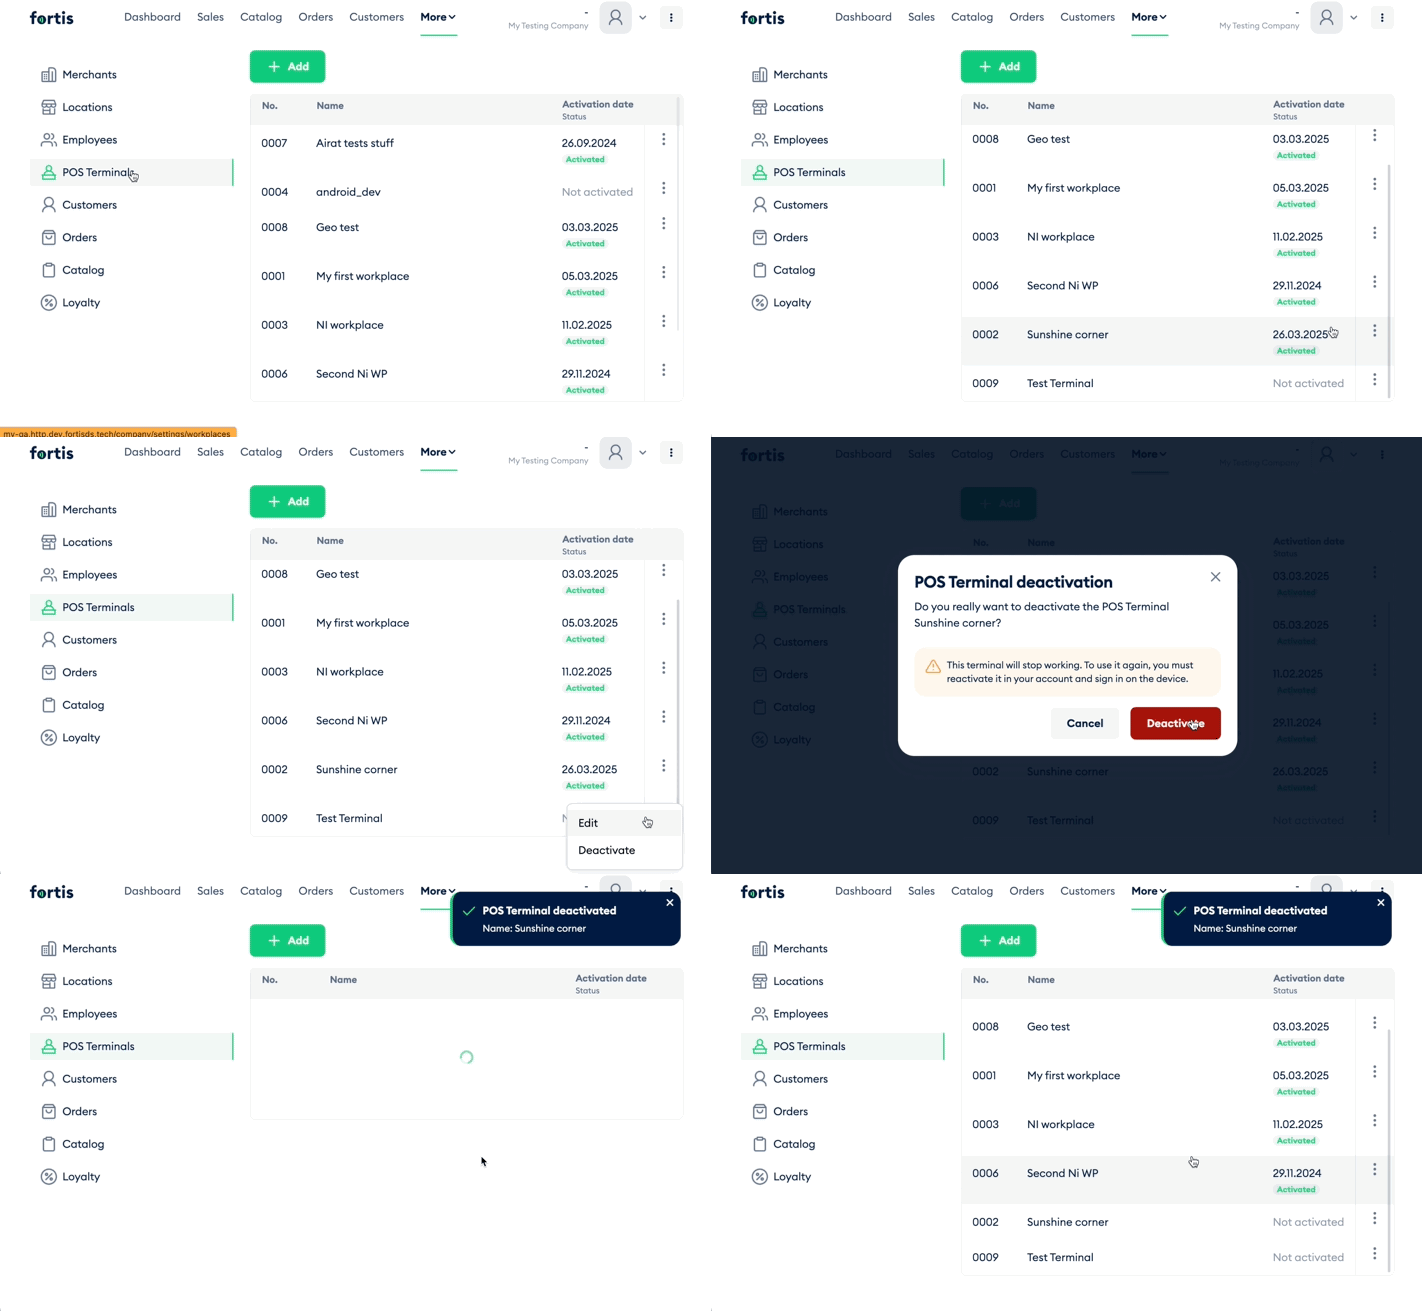
If your Employee quits, you may consider to Deactiate the POS Terminal. You may want to activate it once aagain using new Employee's account. To Deactivate the POS Terminal:
- Go to Settings → POS Terminals.
- Find your Terminal in the list and open its menu.
- Click Deactivate.
- Confirm your action by clicking Deactivate once again.
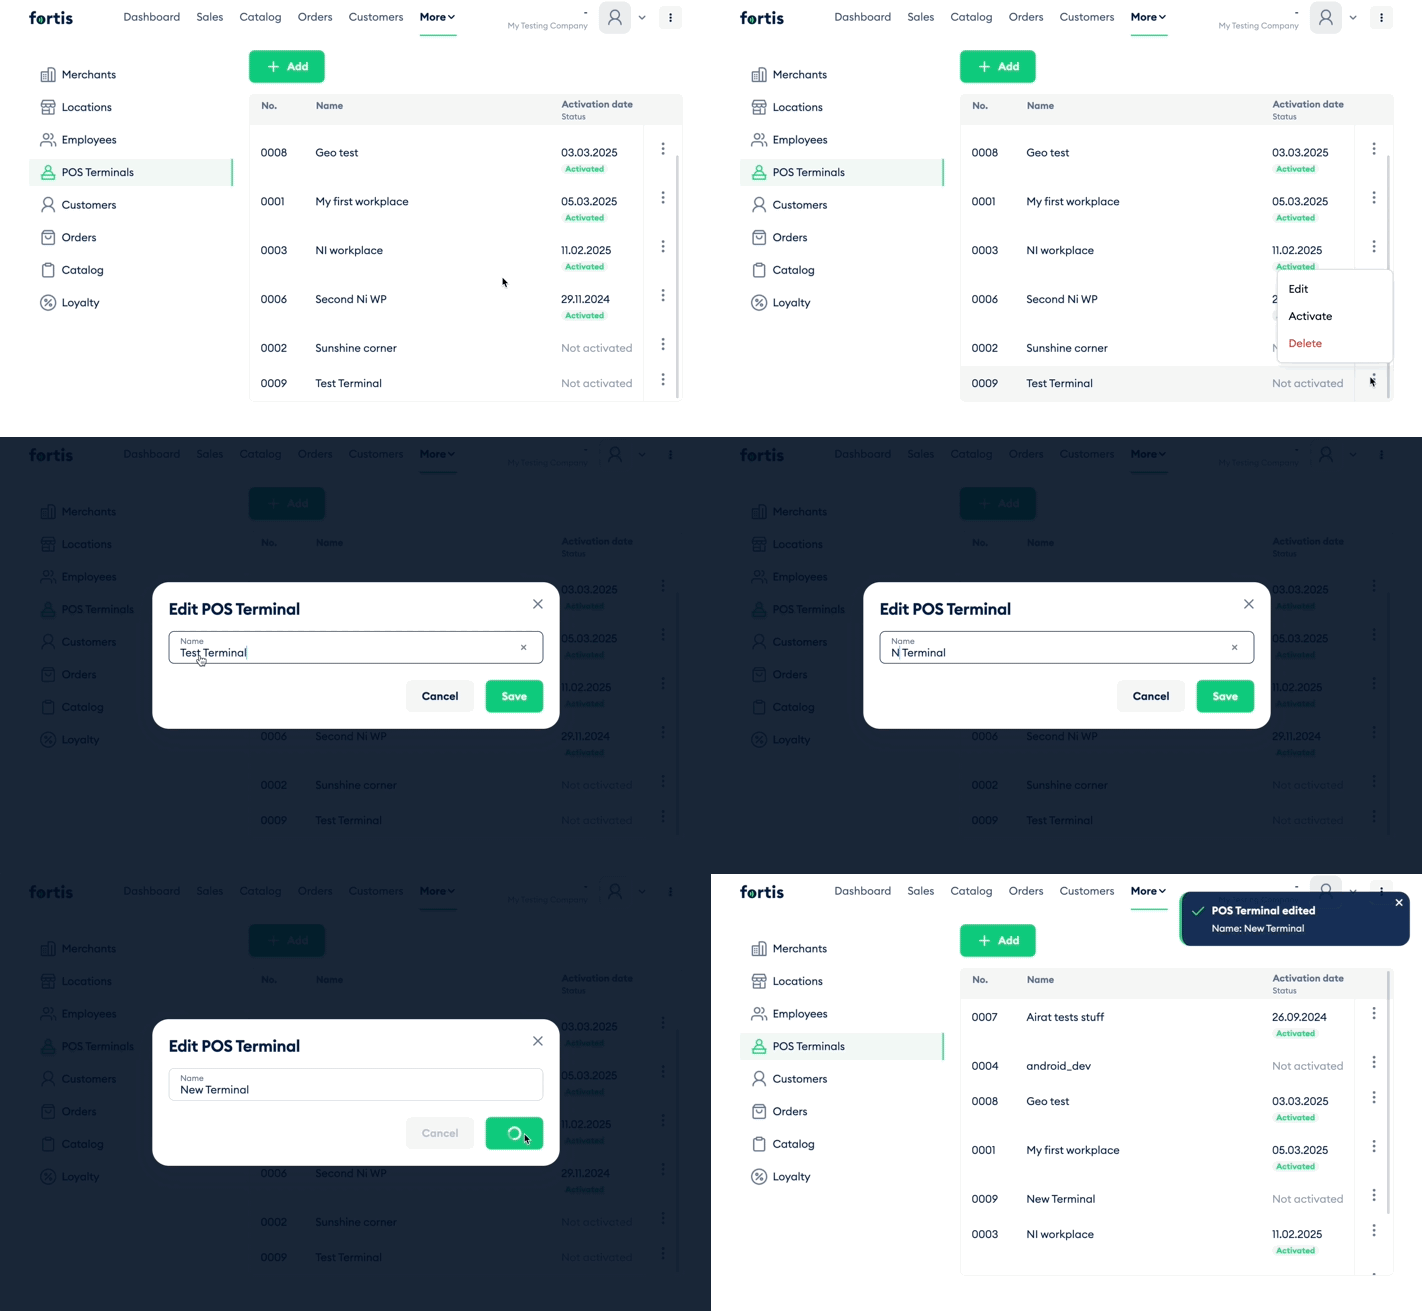
Edit POS Terminal
- Go to Settings → POS Terminals.
- Find your Terminal in the list and open its menu.
- Click Edit.
- Make all the changes and click Save.
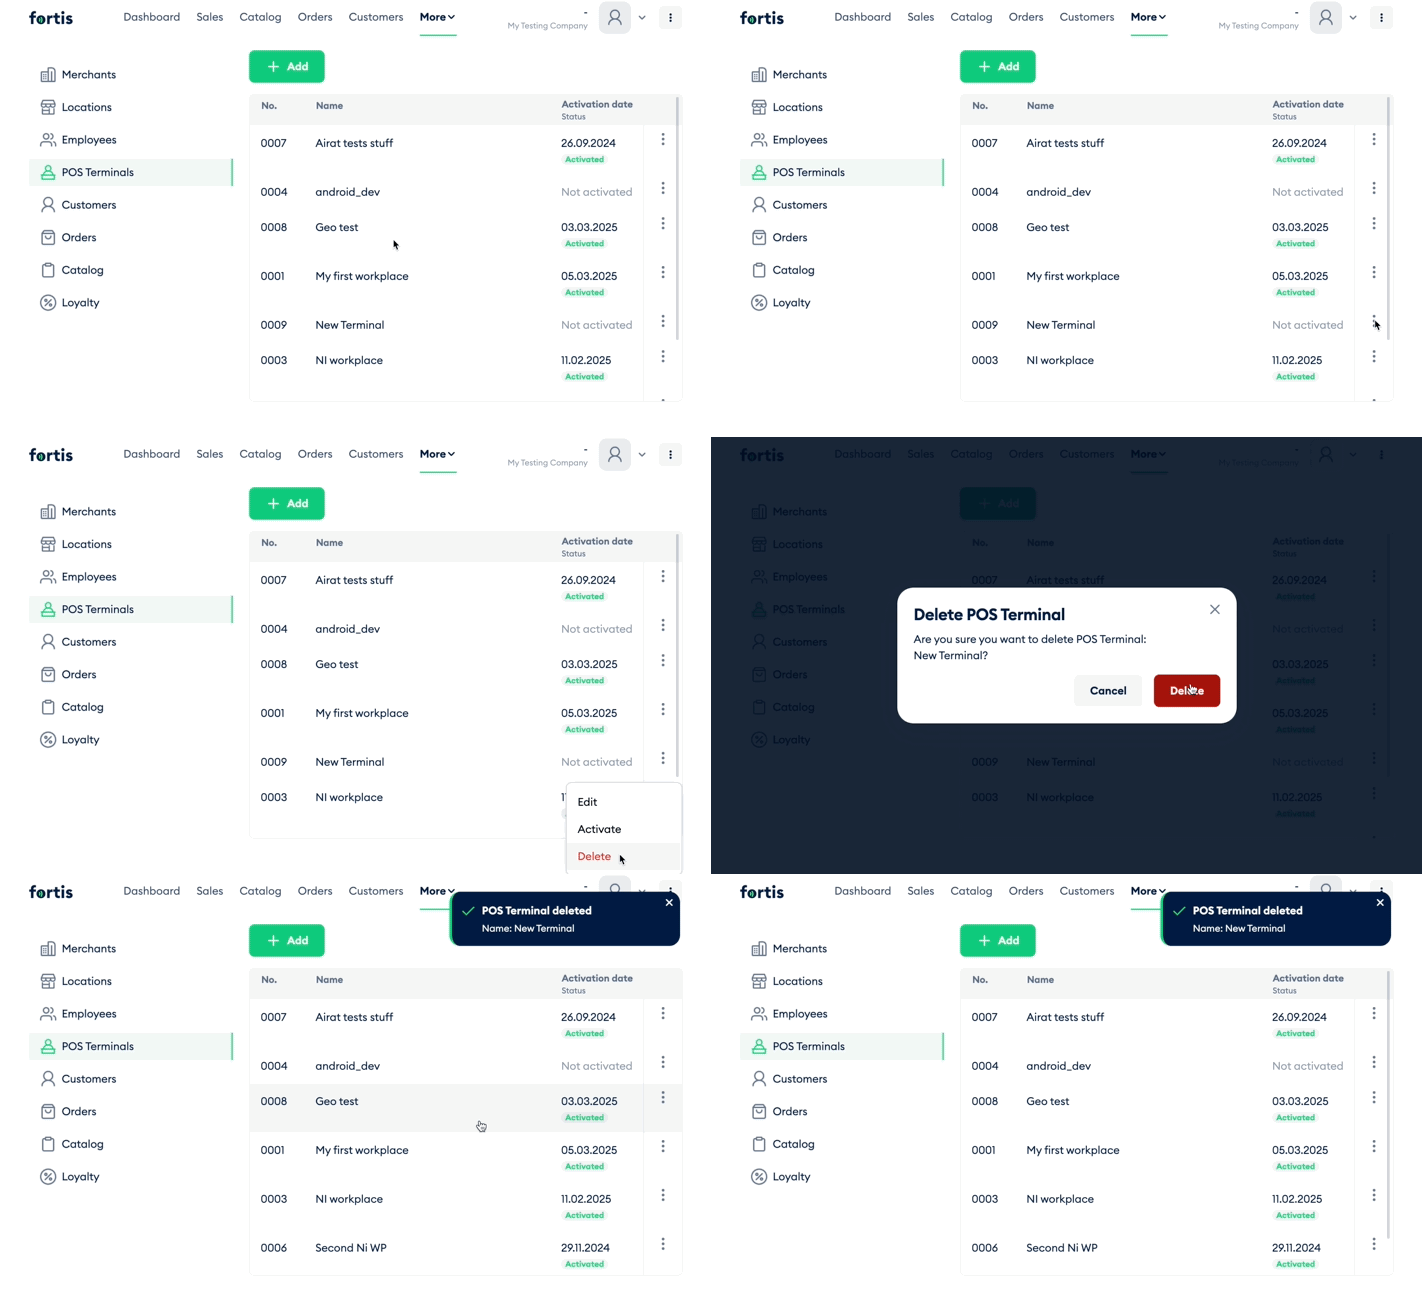
Delete POS Terminal
- Go to Settings → POS Terminals.
- Find your Terminal in the list and open its menu.
- Click Delete.
- Confirm your action by clicking Delete once again.
Done! You’ve added a new POS Terminal. If you have several Employees, keep adding until you’ve added all of them. Once all the info is presented, you can log in to your devices and start your sales.