Managing Your Stock
With Foris POS Platform, you can upload your inventory in minutes. View the full Catalog, filter by category or search by item. Add Stocks to the Catalog items in a few clicks. Optionally add unit cost and vendor details. Let's dive into Fortis inventory management.
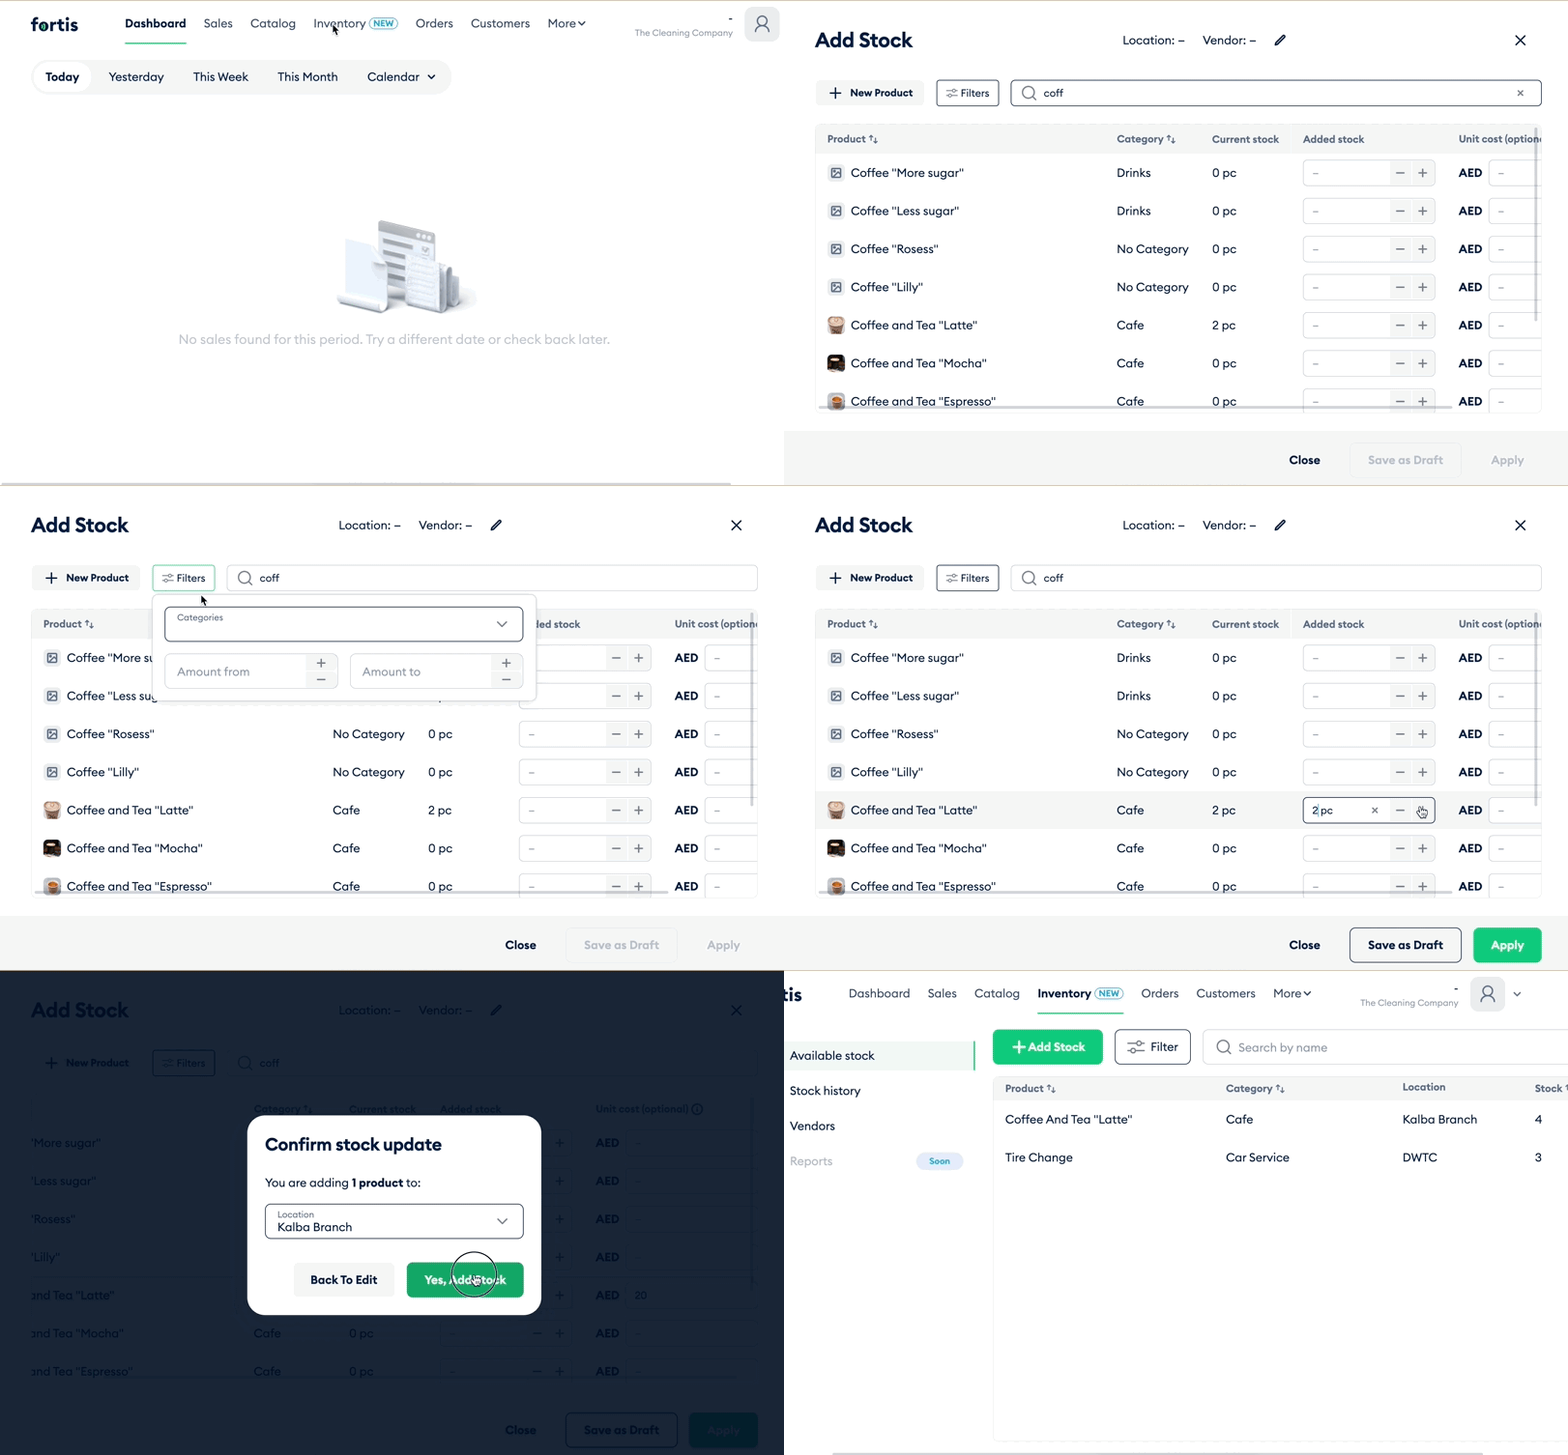
To add your Stock:
- Sign in to your Fortis POS Platform at https://my.fortis.world/auth/login
- Go to Inventory.
- Click Add Stock.
- You will see the list of your Catalog items. You may consider to use Filter button and Search by name field to navigate through the list. If you don't see the appropriate item in the list, you may create one by clicking New Product. How to add items to your Catalog
- Click Edit info at the top of the list to select Location and Vendor. You may use this info later to navigate through your stock list.
- To adjust the stock, click + and - buttons in the Added stock column. You may also consider to enter the Unit cost. At the moment, this field is optional, but we will introduce the Item Profitability report soon, so that you could see which goods make you more profit.
- After adding all the stocks, click Apply. You may also click Save As Draft and apply the changes later.
- Select the Location where your stock is stored, and click Add Stock.

Done! You've added your stock. You will see it in the Available Stocks tab. In the Stock History* tab, you may see all the previously added stocks.
When you sell the item from the chosen Location, the stock stored at that Location will be decreased. Note that, in case of a Refund, Fortis POS Platform doesn't automatically add returned item to the stock. You will need to do that manually.
In the next article, we will discuss Vendors.