Setting Up Your Loyalty Program
Now that we've mastered creating a database of loyal customers, let’s delve into the process of setting up our loyalty programs. This will enable us to offer attractive deals to our valued customers with ease and confidence.
Loyalty Overview
Using Fortis dedicated instruments, you can create multi-level loyalty programs. The more your customers buy from you, the more discount they get. That's why they return to buy from you again and again. It is not just a discount — treat it as an investment in customer retention. Your loyalty program is the foundation of long-term relationships with customers.
Setting Up the Program
- Sign in to your Fortis POS Platform at https://my.fortis.world/auth/login
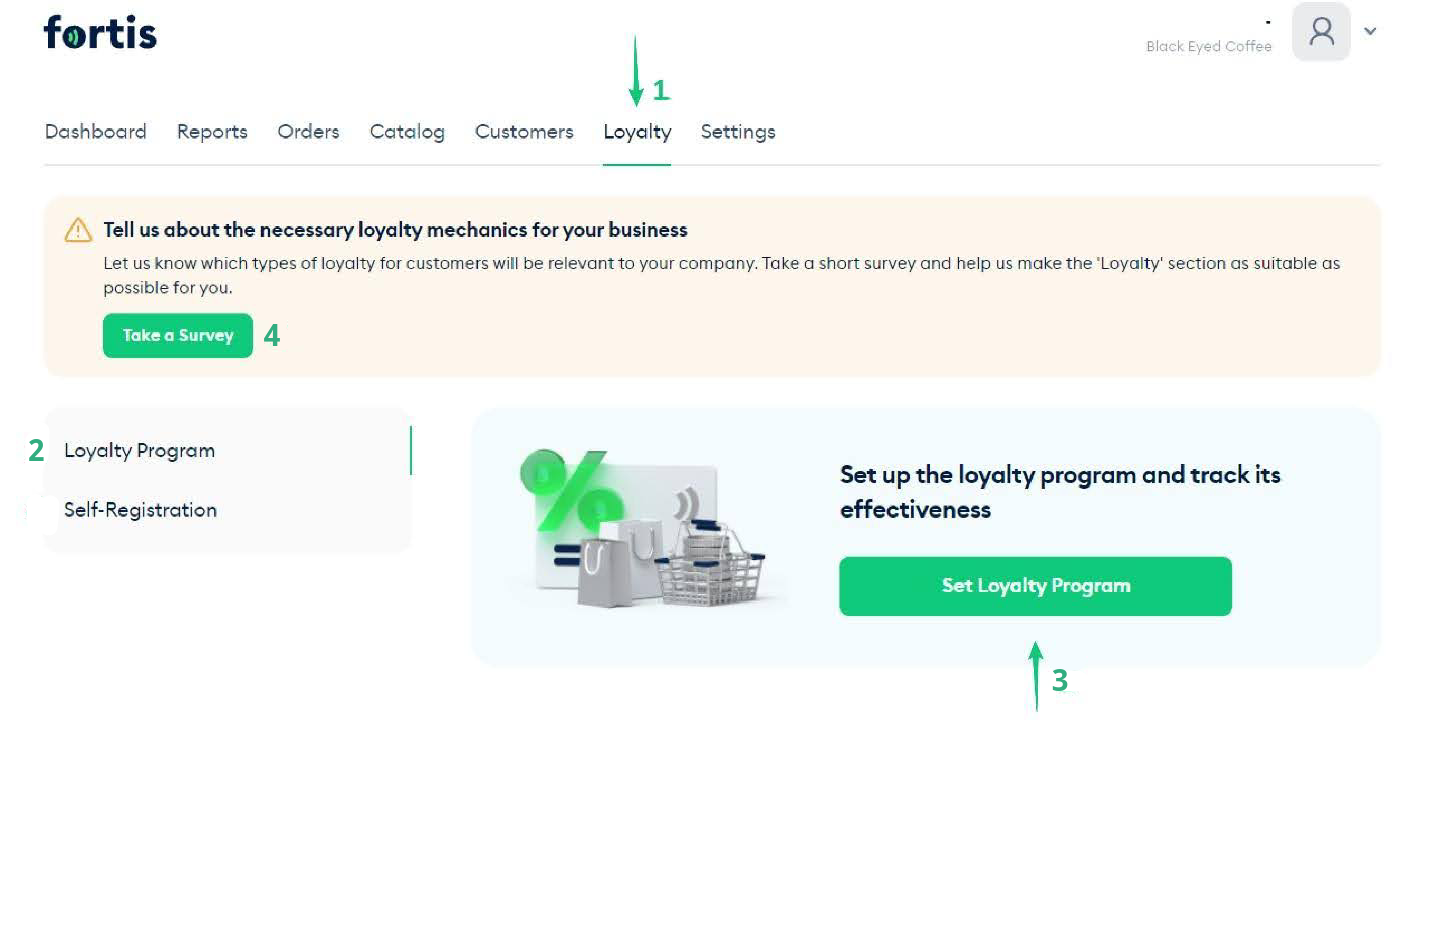
- Go to the Loyalty tab (1) at the top menu.
- The Loyalty Program tab (2) is the one you see on the Screenshot below. You can manually set your loyalty program by clicking the Set Loyalty Program (3) button.
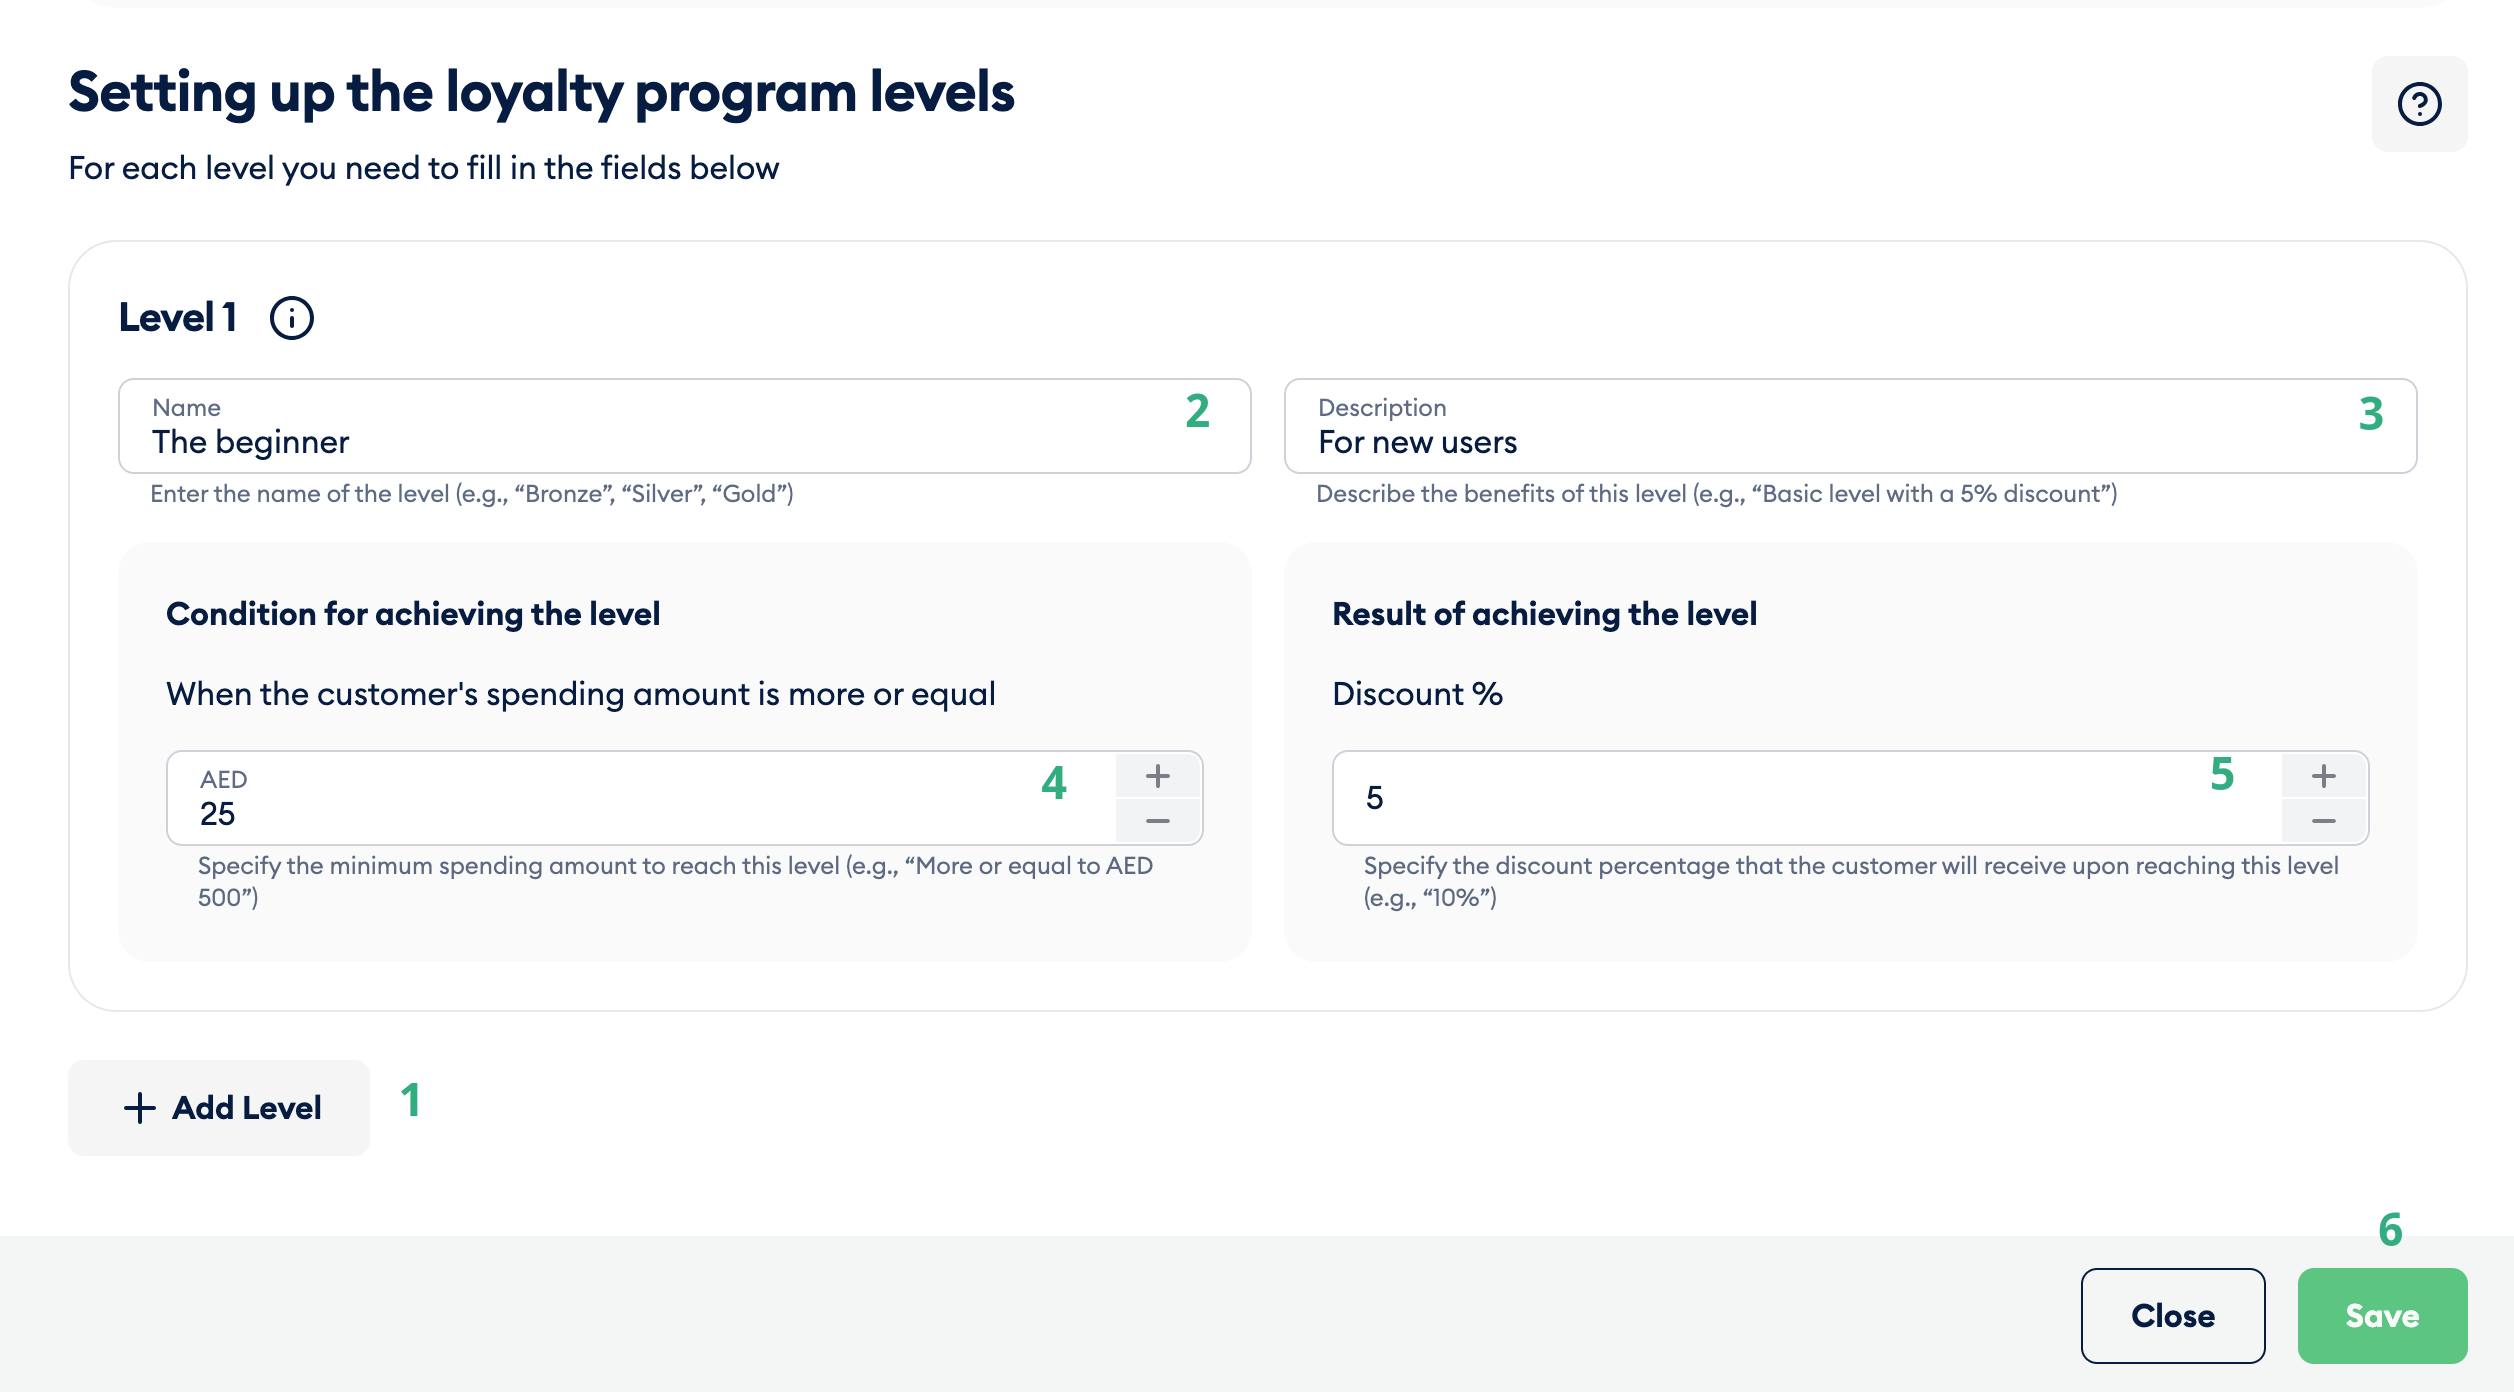
- You can set several loyalty program levels using the Add Level button (1). Then, enter the level's Title (2) and Description (3).
- The Condition section defines the rules of the loyalty program, e.g., when the amount spent by the customer equals or exceeds a specified Spending Amount (4), a Discount (5) is applied to a purchase.
- Once you are done with Loyalty levels, Save (6) your changes.
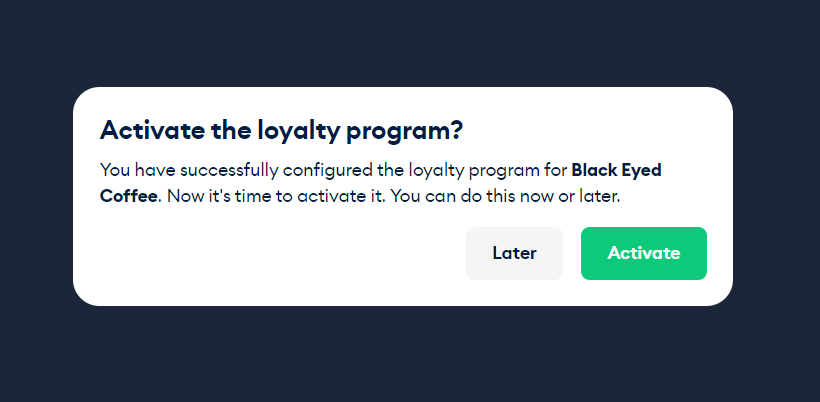
- Click the Activate button to make it live. This will enable your customers to start earning rewards and enjoying its benefits.
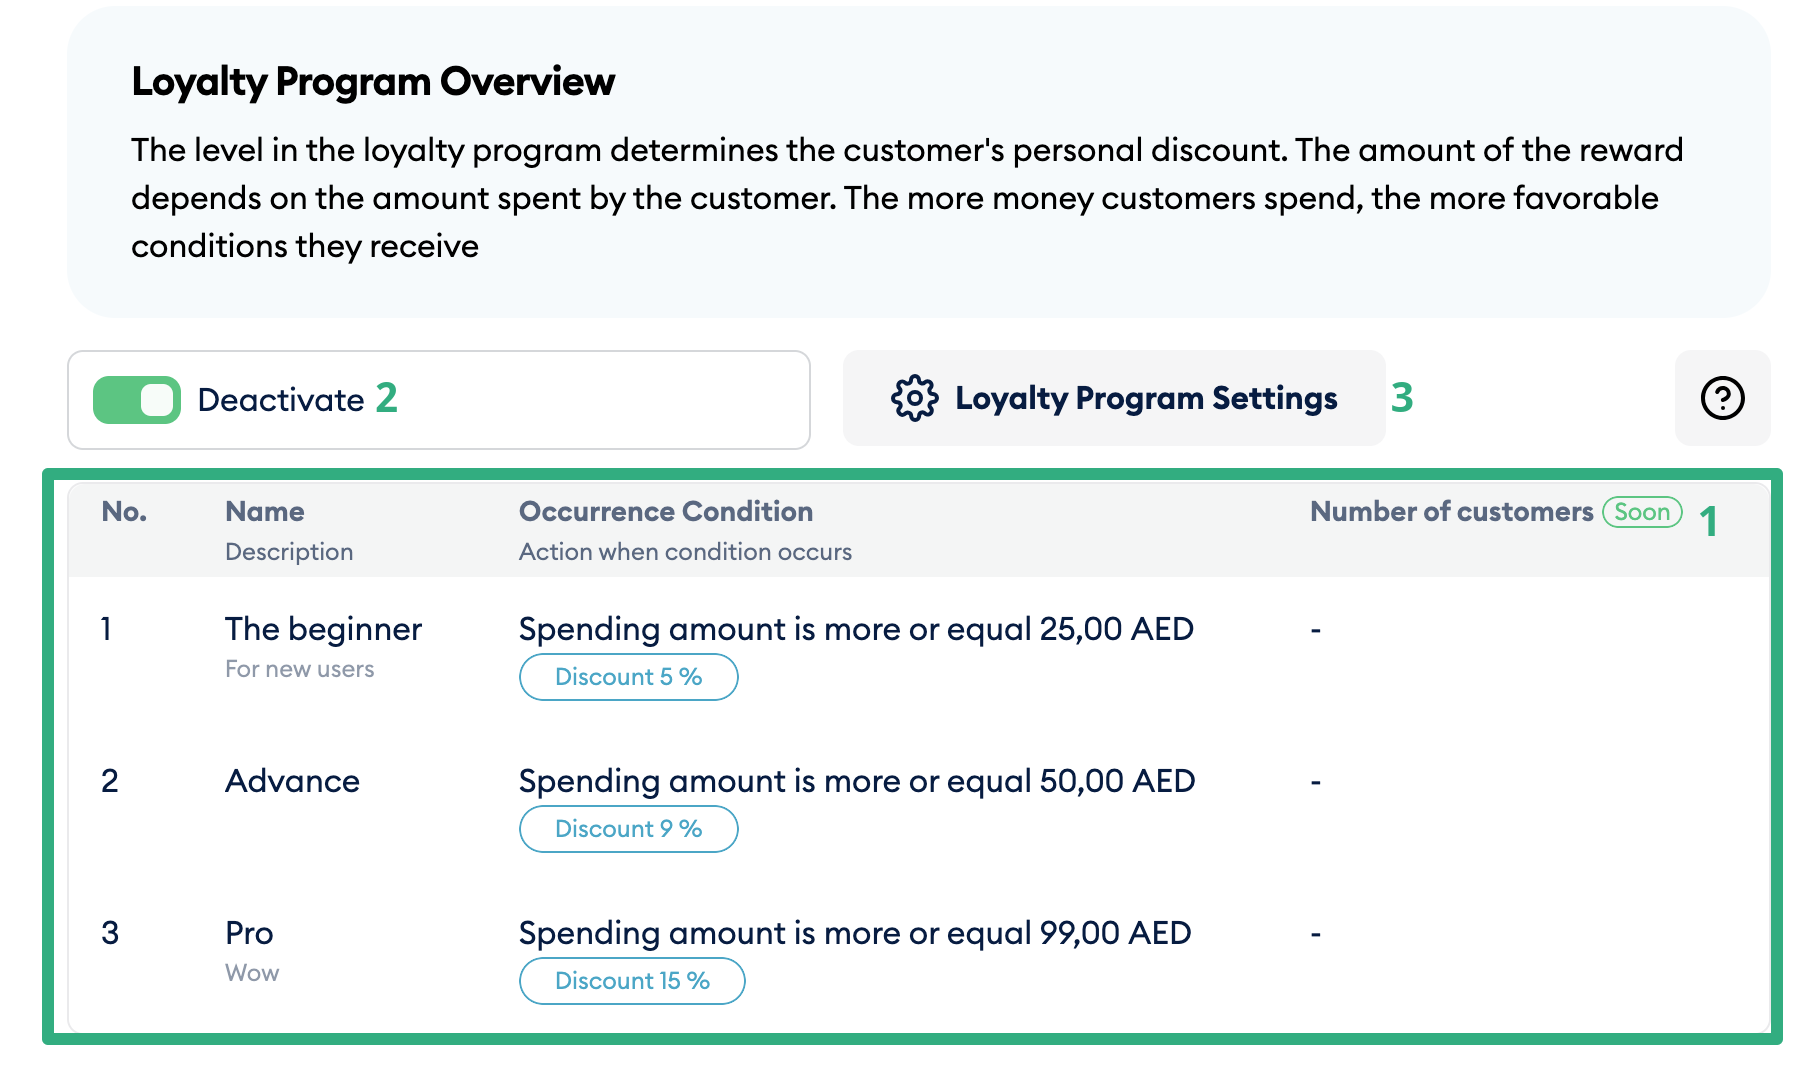
That’s it! You’ve successfully created your first Loyalty Program! The Loyalty tab displays all your current Loyalty Programs. You can review all the details (1), Deactivate (2) your loyalty program, or edit it by clicking Loyalty Program Settings (3).
Self-Registration Form
We have also developed a powerful tool for you to sign up your customers for your loyalty program, the self-registration form. To set up your form, go to Settings → Loyalty.
In the Web Form Link section (2), you may consider to download your loyalty program QR-code or copy the direct link for the form. All the clients must do is scan the code or visit the link and input the information! Hit Preview Web Form (1) to see how your customers will interact with the form.
In the Your Web Form Appearance section, you can change your form's Name (3) or Upload Logo (4).
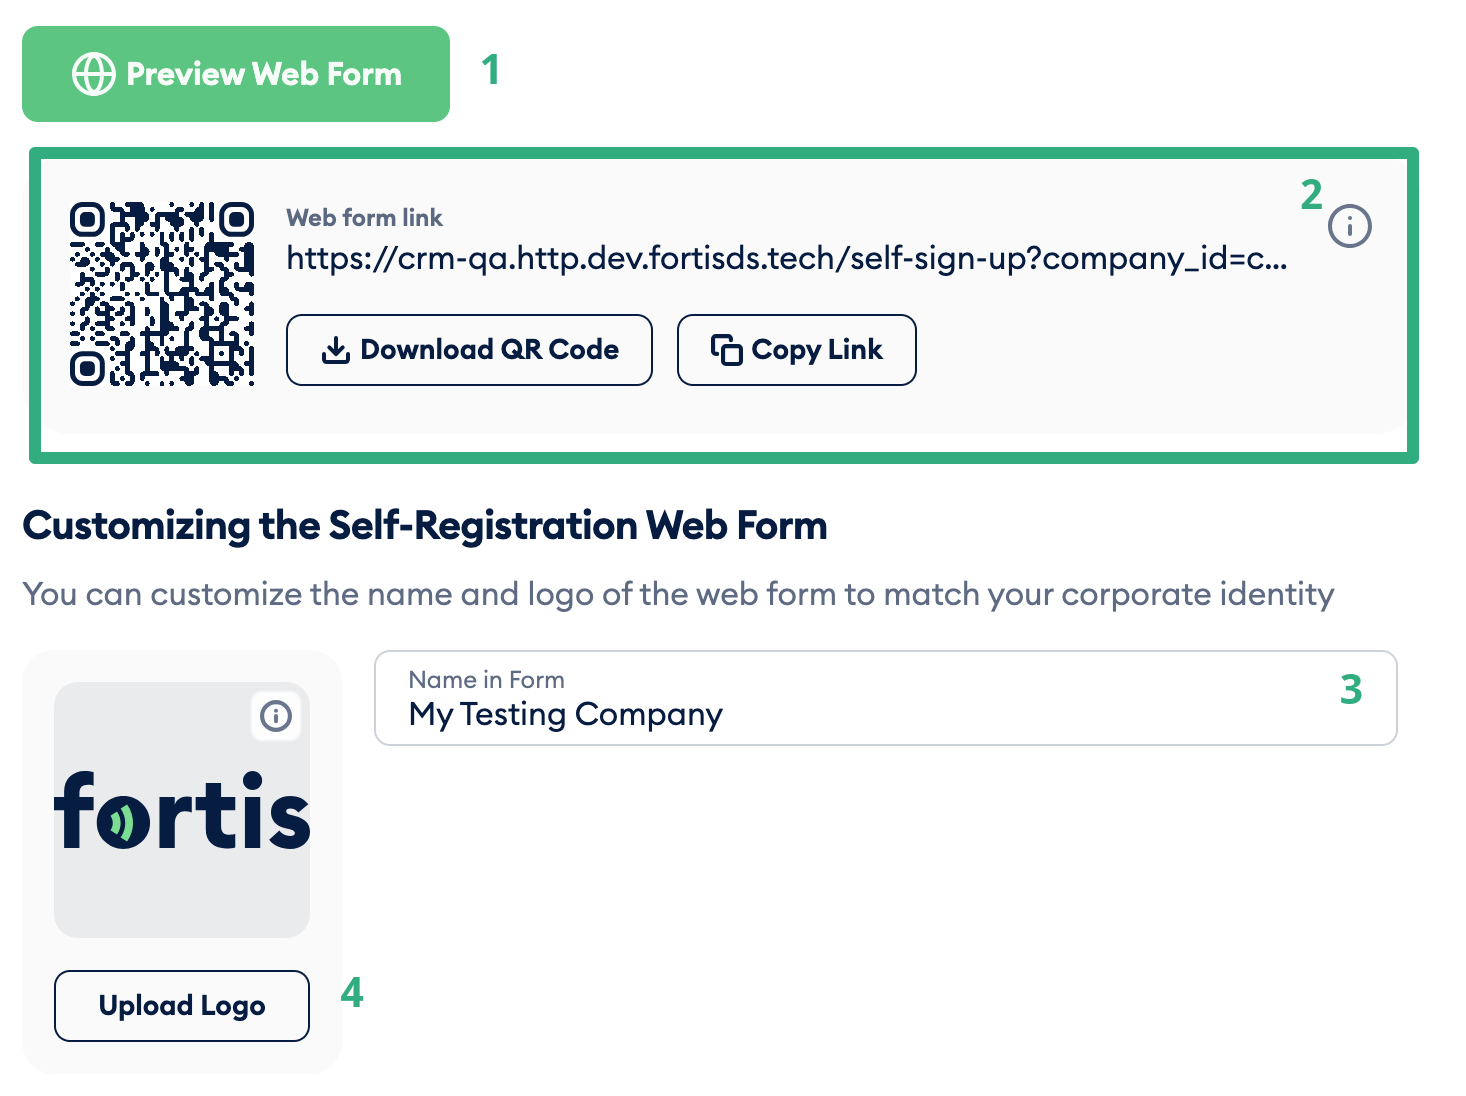
Done! You've set up your Self-Registration Form. That's how it looks.
Note that you can protect your Customer Database from incorrect data using our dedicated Phone Verification tool. Take time too learn more about it!