Adding Items to the Cart
As mentioned in the article on Making Sales, there is a number of ways to add items to the cart.
Catalog
The first method of adding items is to create the item Catalog. Let's dive into it.
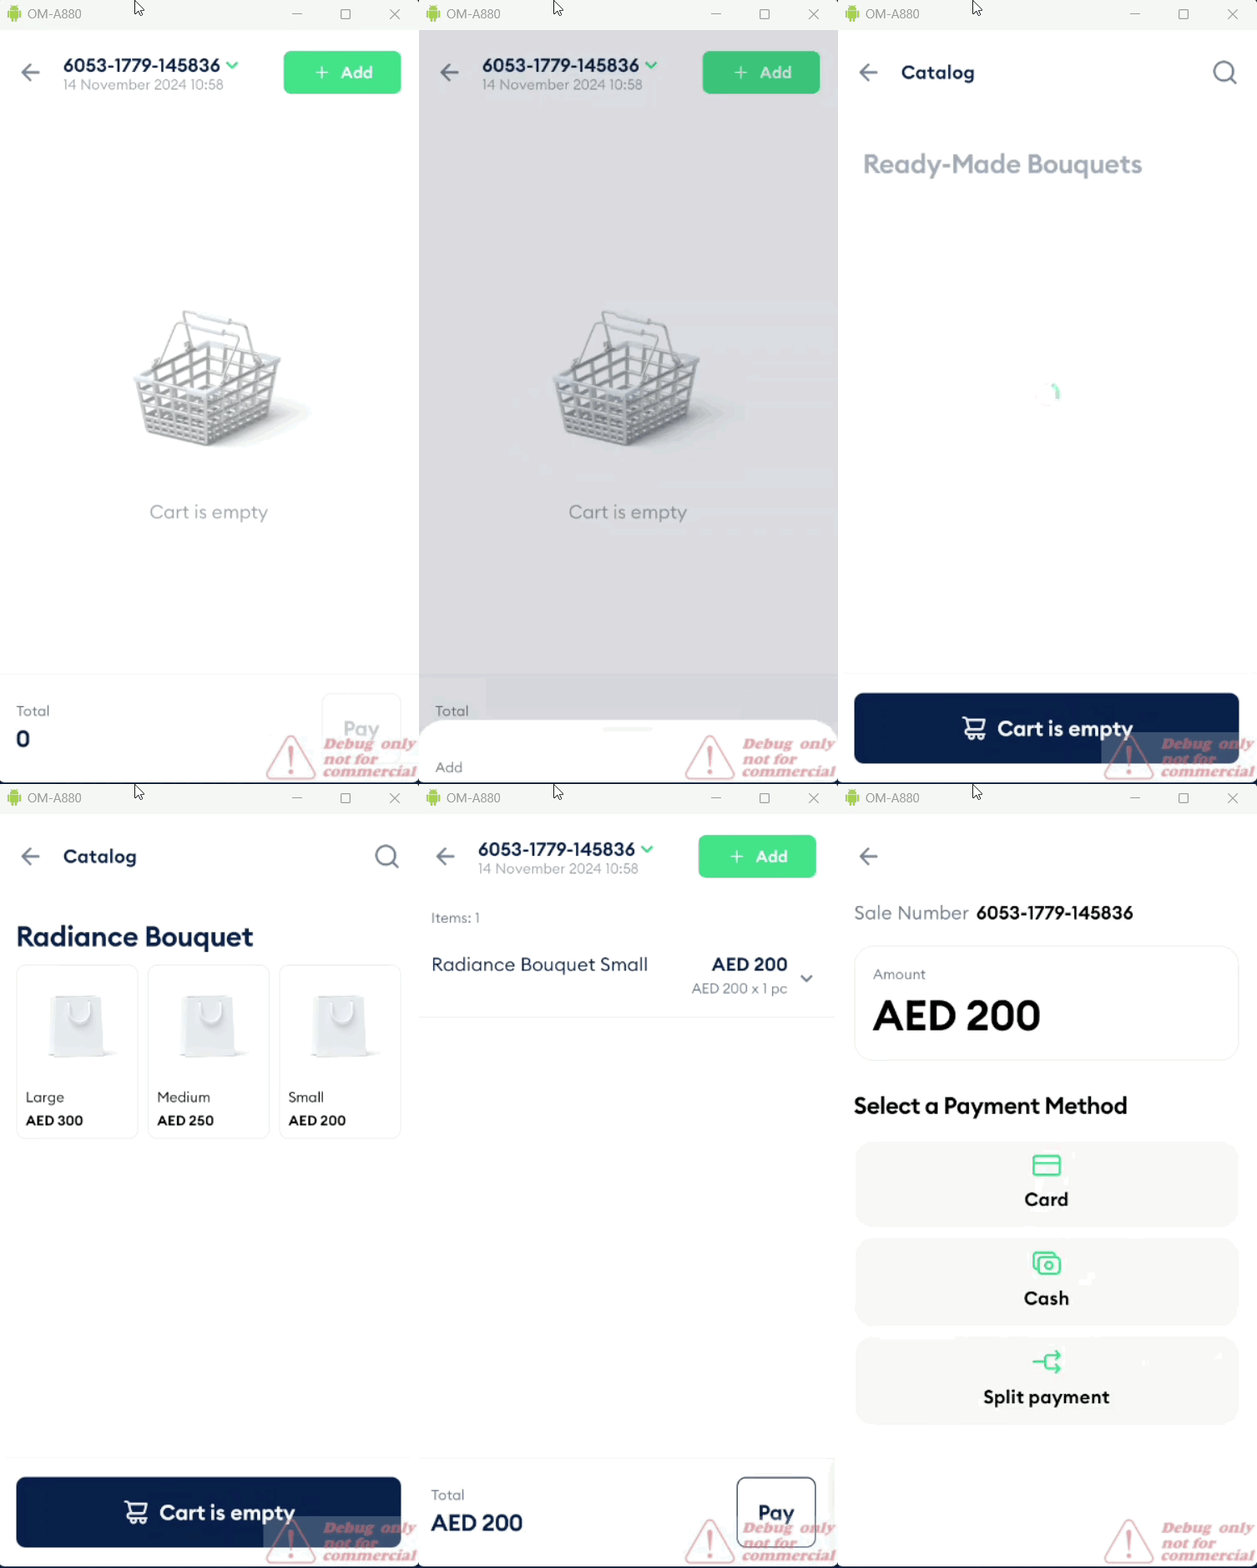
- While in the New Sale window, click Add → Catalog items to see all the shop's parent categories. This feature lets you quickly add items to the cart without manually entering their details. Let's explore this further.
- For your convenience, items in your Catalog are groupped into Categories. Click on the Parent item to see the subsections, then select a subsection to see further variations. To add an item to the cart, click on a desired variation. Clicking more than once will repeat the operation and add one more item to the cart.
- At this point, you can add more items to the cart, or tap To cart to proceed to the next step.

Scanner
One of the other methods uses a scanner. You must choose the Scanner option and scan the desired item's Barcode or QR code. The smart POS machine will do the rest. When you are done adding items, the procedure is exactly the same as when you added items from the catalog: choose the payment method, accept the payment, and print the receipt.

Non-Catalog Item
Another alternative for adding items to the cart is the non-catalog item. That option allows the creation of new products in real-time. Let’s see how to add a non-catalog item to the cart.
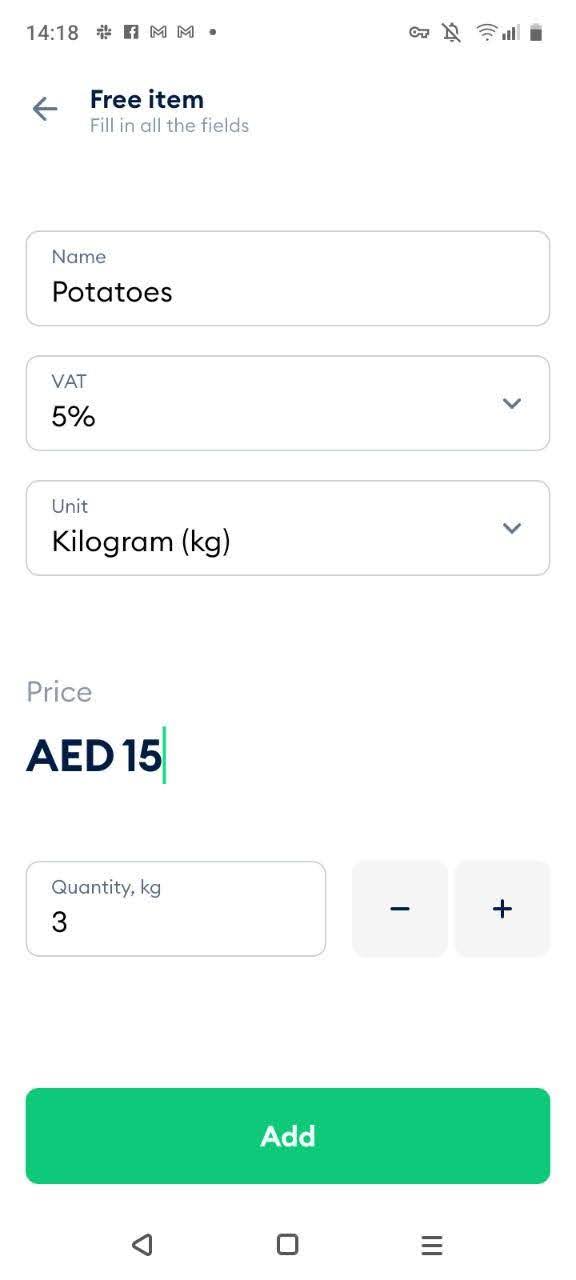
In Sales, tap New Sale and Add at the top right corner. Select a Non-catalog item to open the Non-catalog item window.
Enter the name of a product, choose one of the VAT options (5%, 0%, exempt), and select a unit. Tap on the price to enter it interactively and choose the quantity. Click the Add button to add goods to the cart.

The procedure is identical to other payment options: review the cart to confirm the selection, click the Pay button, choose the payment option, and accept the payment.